

In this last installment, we’ll discuss a demo application that uses PySpark.ML to make a classification model based off of training data stored in both Cloudera’s Operational Database (powered by Apache HBase) and Apache HDFS. Afterwards, this model is then scored and served through a simple Web Application. For more context, this demo is based on concepts discussed in this blog post How to deploy ML models to production.
Make sure you read Part 1 and Part 2 before reading this installment. Using PySpark and Apache HBase, Part 1 and Using PySpark and Apache HBase, Part 2
Background / Overview
Machine learning is now being used to solve many real-time problems. One big use case is with sensor data. Corporations now use this type of data to notify consumers and employees in real-time. Another important need that these corporations have is to easily improve their models when additional data is made more available in real-time.
One specific use-case is detecting fraudulent credit card transactions. For example, given a transaction, let’s say that an ML model predicts that it is a fraudulent transaction. After an employee confirms that the transaction is, in fact, fraudulent, that employee can let the system know that the model made a correct prediction which then can be used as additional training data to improve the underlying model.
With this example as inspiration, I decided to build off of sensor data and serve results from a model in real-time. As a result, I decided to use an open-source Occupancy Detection Data Set to build this application. The training data-set represents sensor data of an office room and with this data, a model is built to predict if the room is occupied by a person or not. In the next few sections, we’ll talk about the training data schema, classification model, batch score table, and web application.
Training Data in HBase and HDFS
Here’s a basic overview of what the training data looks like:
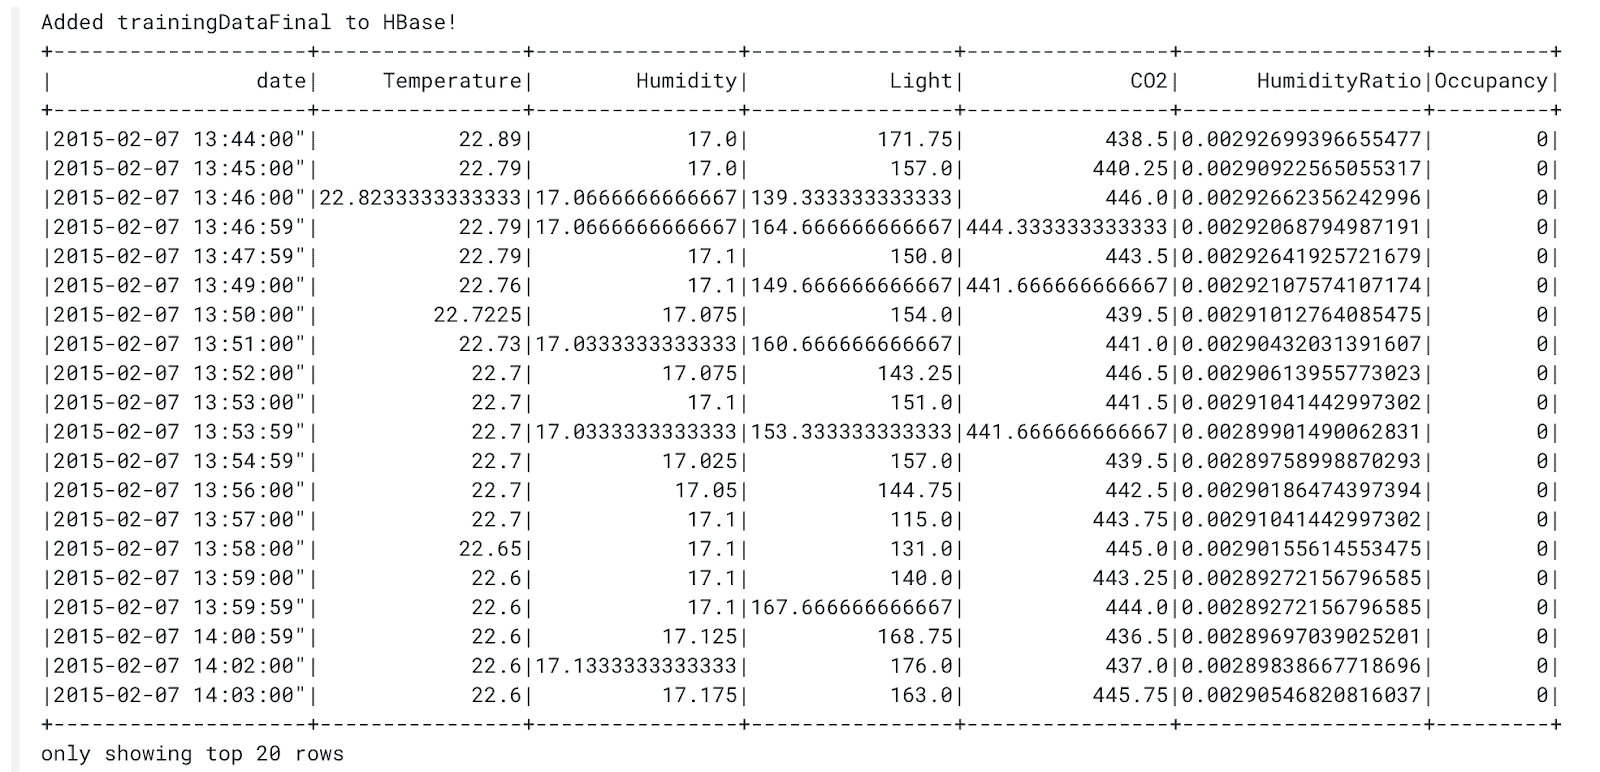
As you can see there are 7 columns, 5 of which are the sensor readings (Temperature, Humidity Ratio, Humidity, CO2, Light). The occupancy column represents if it’s occupied or not (1 represents that it’s occupied and 0 represents that it’s not occupied) which is what the model will be predicting. There’s also a date column, however this is not used for this demo model but any timestamp would be useful to train a model that should consider seasonal changes or AC/HS spikes depending on the time of day.
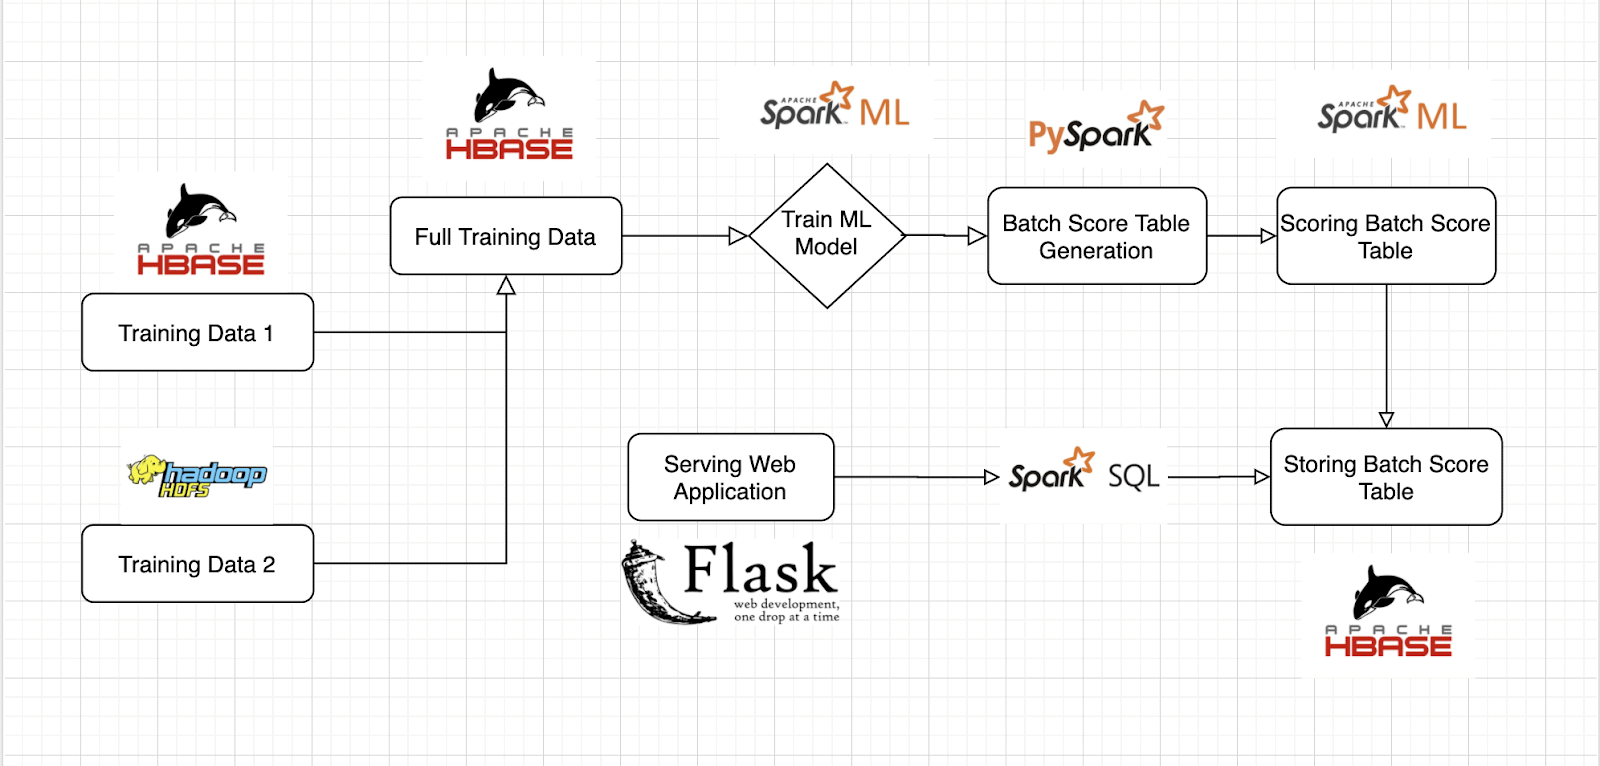
In this demo, half of this training data is stored in HDFS and the other half is stored in an HBase table. This application first loads the data in HDFS into a PySpark DataFrame and then inserts that data into the HBase Table with the rest of the training data. This allows us to have all training data in a centralized location for our model to use.
After combining both sets of training data, the application loads the entire training table through PySpark and passes it to the model.
Building the Model
Now that we have all the training data, we build and use a PySpark ML model.
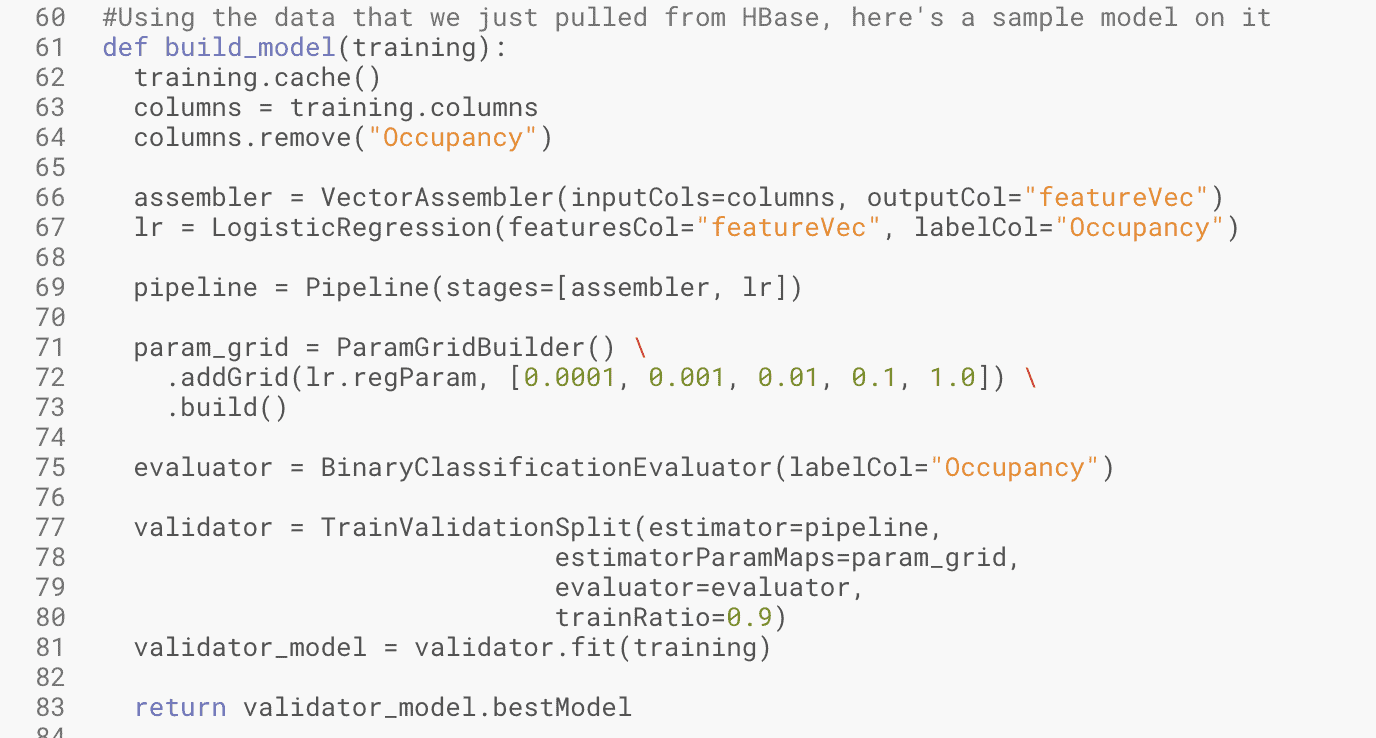
This model uses linear regression to classify if a room is occupied or not. Once we do this, we use BinaryClassificationEvaluator() and TrainValidationSplit() to correctly evaluate and split our data for the model. Once this is done, we fit the model using the training data from HBase.
This code snippet ultimately returns me an ML model where I’m given a set of 5 sensor inputs, it’ll return a binary number prediction, 1 representing “Occupied” and 0 representing “Not Occupied”
Creating and Storing Batch Score Table
Now that a simple model has been created, we need to score the model. In order to do this, I created a batch score table in HBase. A batch score table is a table that stores all the possible sensor input combinations and the prediction of each combination using the model. This pre-computation is done in order to serve the results with ms latency. My application uses PySpark to create all the combinations, classify each of them, and then build a DataFrame to store in HBase.
HBase can easily store a batch score table with trillions of rows, but for simplicity, this application stores 250,000 scored combinations/rows. This table can be massively scaled to any use-case and this is why HBase is superior in this application as it’s a distributed, scalable, big data store.
Serving The Model
In order to use this data, I built a very simple demo using the popular Flask framework for building web applications. There are basically two goals of this web application. First, display if a room is occupied or not through real-time streaming data. Second, add a function where when a user confirms the occupancy prediction is right, it is added to the training data.
In order to mimic real-time streaming data, I randomly generated sensor values in Javascript every 5 seconds. Once new numbers are generated, the web-app does a simple look-up in the Batch Score Table in HBase to get the prediction. This simple look-up is done through a PySpark.SQL query and once the query retrieves the prediction, it is displayed on the web application.
In the demo application, there’s also a button that allows the user to add data to the training data table in HBase at any time. Below is a simple screen recording of the demo application.
How to Run This Demo Application
Now if you want to run and mimic this Demo Application in CDSW, here’s how:
- Make sure PySpark and HBase are configured – For reference look at Part 1
- Make a new project on CDSW and select “Git” under the “Initial Setup” section
- Use “https://github.com/mchakka/PySpark-HBaseDemoApp.git” for the Git URL
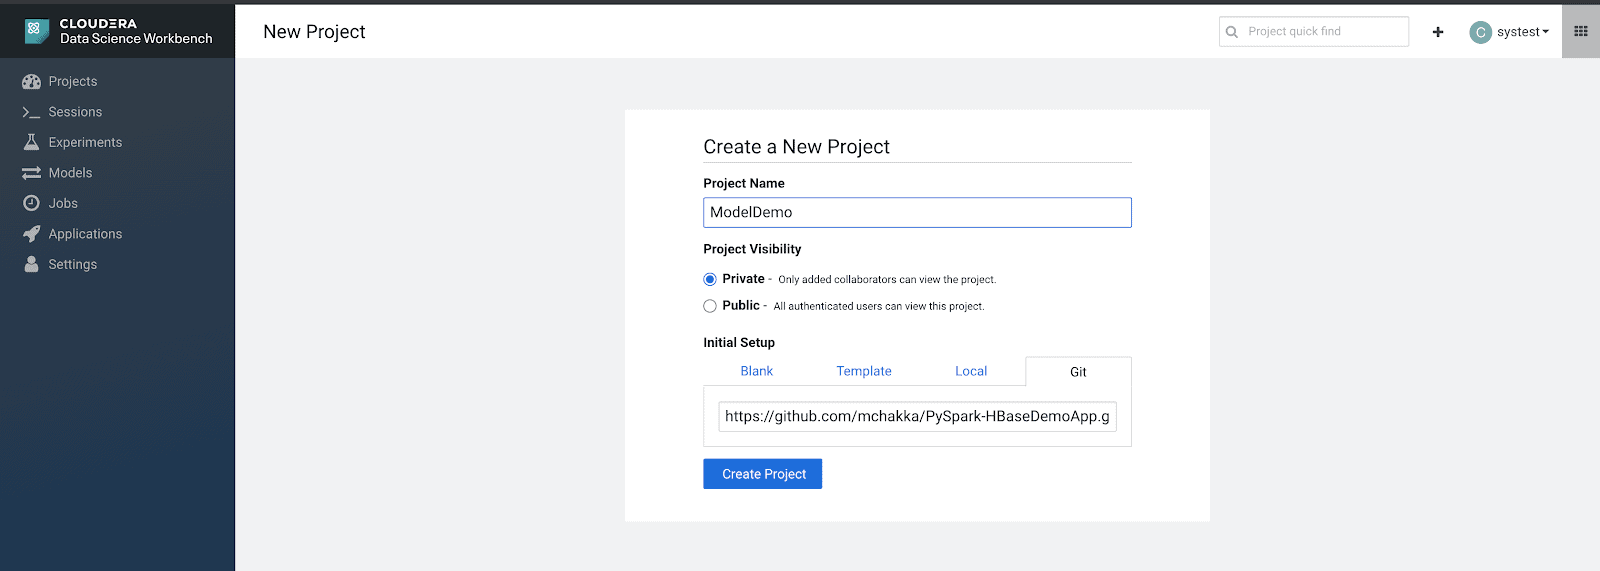
- Use “https://github.com/mchakka/PySpark-HBaseDemoApp.git” for the Git URL
- Create a new session with Python3
- Run preprocessing.py on your CDSW project
- This will put all training data into HBase
- Upload and Run main.py on your CDSW project
- Creates the model
- Builds and Scores batch score table
- Stores batch score table in HBase
- Upload and Run app.py on your CDSW project
In order to view the web application, go to http://<$CDSW_ENGINE_ID>.<$CDSW_DOMAIN>
Conclusion and Takeaways
This application demonstrates how PySpark is leveraged in order to build a simple ML Classification model using HBase as an underlying storage system. Regardless, there are a few takeaways from this demo application.
- For data already existing in HBase, PySpark allows for easy access and processing with any use-case.
- Through PySpark, data can be accessed from multiple sources
- Serving ML Applications often requires scalability, hence HBase and PySpark is proven to satisfy that requirement.
Building ML models directly on HBase data is now available for any data scientist and data engineer. Using the methods from Part 1 and Part 2, “hbase-connectors” now allows for easy python access along with powerful Spark functionality for HBase data.
Try out this demo application yourself! GitHub Repo Link
Editor's Choice

