
Follow your data in object storage on-premises
As businesses look to scale-out storage, they need a storage layer that is performant, reliable and scalable. With Apache Ozone on the Cloudera Data Platform (CDP), they can implement a scale-out model and build out their next generation storage architecture without sacrificing security, governance and lineage. CDP integrates its existing Shared Data Experience (SDX) with Ozone for an easy transition, so you can begin utilizing object storage on-prem. In this article, we’ll focus on generating and viewing lineage that includes Ozone assets from Apache Atlas.
About Ozone integration with Atlas
With CDP 7.1.4 and later, Ozone is integrated with Atlas out of the box, and entities like Hive, Spark process, and NiFi flows, will result in Atlas creating Ozone path entities. For example, writing a Spark dataset to Ozone or launching a DDL query in Hive that points to a location in Ozone. Prior to that, entities created with an Ozone path resulted in creating HDFS path entities.
This integration mechanism does not provide a direct Atlas Hook or Atlas Bridge option to listen to the entity events in Ozone. As such, Atlas does not have a direct hook and only the path information is provided. As we’ll see, Atlas populates a few other attributes for Ozone entities.
Before we begin
This article assumes that you have a CDP Private Cloud Base cluster 7.1.5 or higher with Kerberos enabled and admin access to both Ranger and Atlas. In addition, you will need a user that can create databases and tables in Hive, and create volumes and buckets in Ozone.
Also, to provide some context for those new to Ozone, it provides three main abstractions. If we think about them from the perspective of traditional storage, we can draw the following analogies:
- Volumes are similar to mount points. Volumes are used to store buckets. Only administrators can create or delete volumes. Once a volume is created, users can create as many buckets as needed.
- Buckets are similar to subdirectories of that mount point. A bucket can contain any number of objects, but buckets cannot contain other buckets. Ozone stores data as objects which live inside these buckets.
- Keys are similar to the fully qualified path of files.
This allows for security policies at the volume or bucket level so you can isolate users, as it makes sense for your requirements. For example, my data volume could contain multiple buckets for every stage of the data, and I can control who accesses each stage. Another scenario could be each line of business gets their own volume, and they can create buckets and policies as it makes sense for their users.
Loading data into Ozone
Let’s start with loading data into Ozone. In order to do that, we first need to create a volume and a bucket using the Ozone shell. The commands to do so are as follows:
ozone sh volume create /data
ozone sh bucket create /data/tpc
I’ve chosen those names because I’ll be using an easy method for generating and writing TPC-DS datasets, along with creating their corresponding Hive tables. You can find the tool I’m using at the repo here. However, feel free to pick your labels for the volume and bucket and bring your data. Before that, let’s verify the bucket exists in two ways:
- Using the Ozone shell
ozone sh bucket list /data
You should see something similar to
{
 "metadata" : { },
  "volumeName" : "data",
  "name" : "tpc",
  "storageType" : "DISK",
  "versioning" : false,
  "usedBytes" : 0,
  "usedNamespace" : 0,
  "creationTime" : "2021-07-21T17:21:18.158Z",
  "modificationTime" : "2021-07-21T17:21:18.158Z",
  "encryptionKeyName" : null,
  "sourceVolume" : null,
  "sourceBucket" : null,
  "quotaInBytes" : -1,
  "quotaInNamespace" : -1
}
- Using the Hadoop CLI
hdfs dfs -ls ofs://ozone1/data/tpc
The Ozone URI takes the form of ofs://<ozone_service_id>/<volume>/<bucket>. If you don’t know the first part, you can easily find it in Cloudera Manager by going to Clusters > Ozone and choosing the configuration tab. From there you can search for service.id and see something like

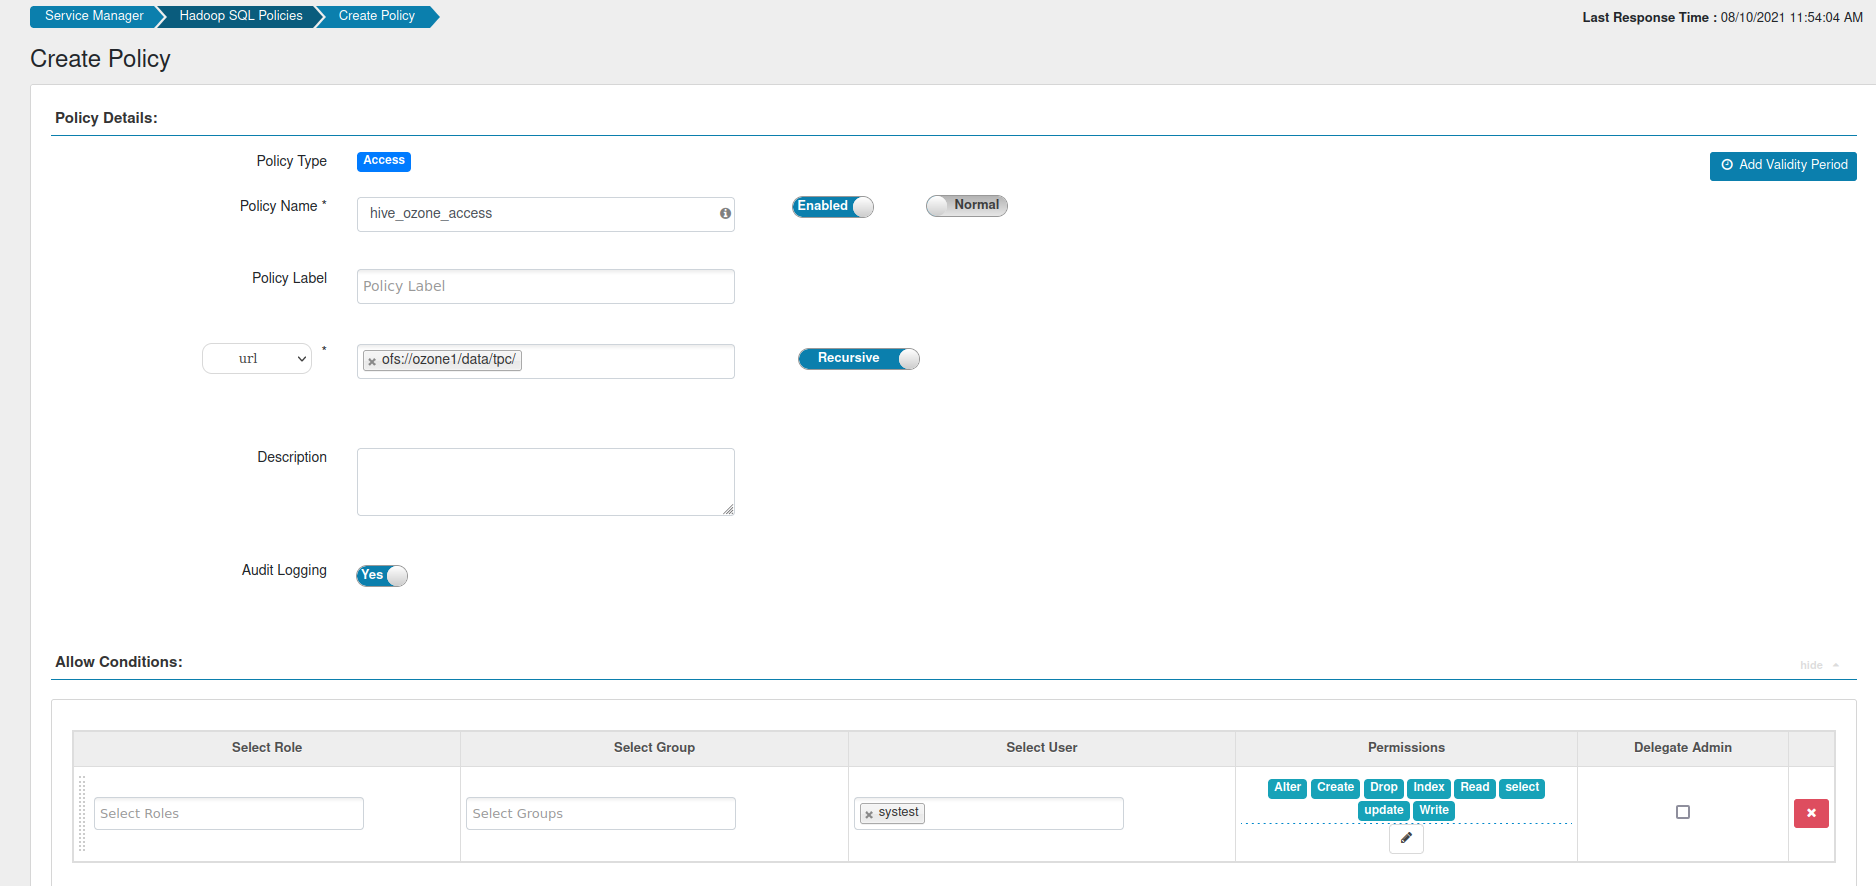
With our bucket created, let’s finalize security for Hive. I mentioned at the beginning that you’d require a user with fairly open access in Hive and Ozone. However, despite that access, there’s still one more policy required for us to create tables that point to a location in Ozone. Now that we’ve created that location, we can create a policy like below:

As you can see, this utilizes the URI in Ozone where we loaded data. By creating this policy, we’re allowing SQL actions access to the volume and the bucket within it. Thus, we’re able to create tables in Hive.
Now we can begin loading data.
- If you’re bringing your own, it’s as simple as creating the bucket in Ozone using the Hadoop CLI and putting the data you want there:
hdfs dfs -mkdir ofs://ozone1/data/tpc/test
hdfs dfs -put <filename>.csv ofs://ozone1/data/tpc/test
- If you want to use the data generator, clone the repo locally and change into the directory.
git clone https://github.com/dstreev/hive-testbench.git - From there, you can run the following:
hdfs dfs -mkdir ofs://ozone1/data/tpc/tpcds
./tpcds-build.sh
./tpcds-gen.sh --scale 10 --dir ofs://ozone1/data/tpc/tpcds
- Upon success, you’ll see these messages:
TPC-DS text data generation complete.
Loading text data into external tables.
If you need to create a table for your data, it’s as simple as launching a DDL query with the location pointing to the Ozone address where the data was loaded.
Viewing lineage in Atlas
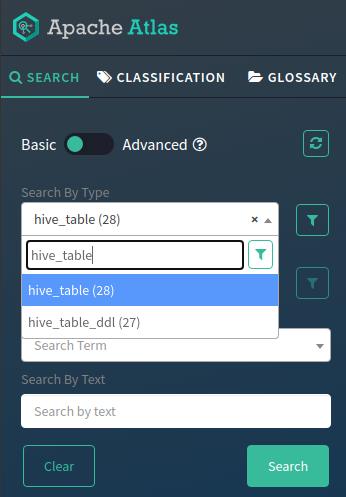
Once tables are in place, we can begin to see lineage in Atlas. To view the tables you’ve created, pull down the Search By Type bar and enter hive_table. Once that’s been selected, click the search button to view all tables.

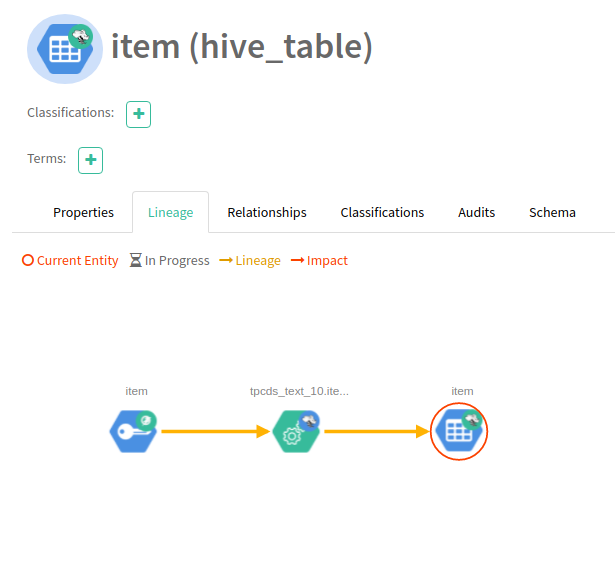
Click on the table you want to view and notice the lineage tab on the right (see below). You’ll notice that Hive tables and processes are present but so are Ozone keys.

Now that we have data in Hive, let’s propagate the lineage with Spark.
Writing to Ozone in Spark
Since the purpose of this blog is to show lineage for data that exists in Ozone, I’m going to do a simple transformation in the Spark shell and write the data out to Ozone. Feel free to bring your code or run queries as you’d like against the data you have there. If you want to follow along, here are the steps:
- Launch spark-shell in client mode
spark-shell --master yarn --deploy-mode client --conf spark.yarn.access.hadoopFileSystems=ofs://ozone1/data/tpc/ - Create a dataset from the customer table
val customerDs = spark.sql("SELECT * FROM tpcds_text_10.customer") - Fill in any nulls for the columns c_birth_year, c_birth_month, and c_birth_day. In this example, we’re filling null years with 1970 and null months and days with 1.
val noDobNulls = customerDs.na.fill(1970, Seq("c_birth_year")).na.fill(1, Seq("c_birth_month", "c_birth_day")) - Left pad the month and day columns so they’re all the same length and create the birthDate column to concatenate year, month, and day separated by a dash.
val paddedMonth = lpad(col("c_birth_month"), 2, "0")
val paddedDay = lpad(col("c_birth_day"), 2, "0")
val birthDate = concat_ws("-", col("c_birth_year"), paddedMonth, paddedDay)
- Add the c_birth_date column to the dataset where we filled in null values
val customerWithDob = noDobNulls.withColumn("c_birth_date", birthDate) - Write the transformed data to Ozone in ORC format
customerWithDob.write.mode(SaveMode.Overwrite).orc("ofs://ozone1/data/tpc/tpcds/10/customer_orc")
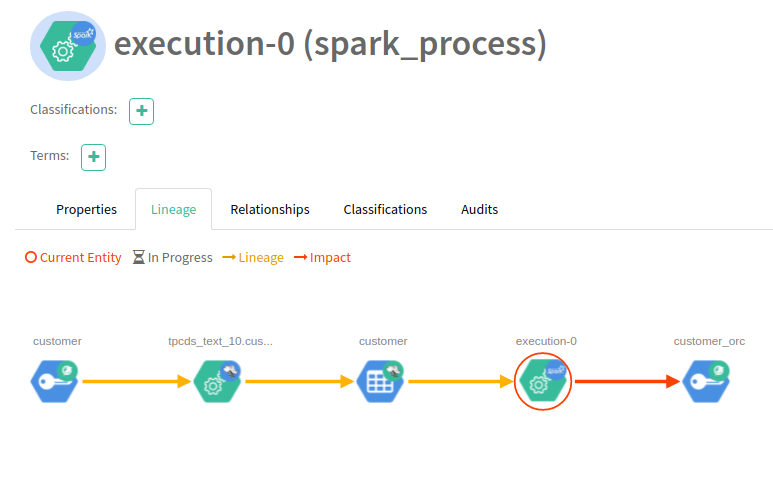
Going back to Atlas, you can see the lineage has propagated from our Spark process.

Summary
Now you have seen how CDP provides an easier transition to an on-prem, private cloud architecture without sacrificing crucial aspects of security, governance, and lineage. With Ozone in place, you can begin to scale-out compute and storage separately and overcome the limitations of HDFS. If you want to continue experimenting with Ozone and Atlas, you can try writing to Ozone via Kafka using our documented configuration examples. Then you can import Kafka lineage using the Atlas Kafka import tool provided with CDP. After that, checkout our Knowledge Hub to see what all is available to you with CDP and how to get there!


