

Editor’s Note, August 2020: CDP Data Center is now called CDP Private Cloud Base. You can learn more about it here.
Wire encryption protects data in motion, and Transport Layer Security (TLS) is the most widely used security protocol for wire encryption. TLS provides authentication, privacy and data integrity between applications communicating over a network by encrypting the packets transmitted between endpoints. Users interact with Hadoop clusters via browser or command line tools, while applications use REST APIs or Thrift.
Steps to enable TLS manually
The typical process to enable wire encryption on Hortonworks Data Platform (HDP) or Cloudera Enterprise (CDH) clusters is described below.
Get Certificates
- Generate a public/private keypair on each host
- Generate the Certificate signing request (CSR) for all the hosts.
- Get the CSR signed by the company’s internal Certificate Authority (CA).
- Generate keystore & truststore and deploy them across all the cluster hosts.
Cluster configuration
- For each service, enable TLS by setting the keystore and truststore configuration.
- Restart the affected components before proceeding to enable TLS for the next service.
- Make the required changes outside of the cluster manager’s UI (like setting up truststore, Enabling Knox SSL, etc.)
Ongoing Maintenance
- For new service installation, the keystore and truststore information need to be configured for the service. Restart the impacted services.
- For each new host to be added to the cluster, admins would have to perform the steps from the “Get Certificates” section (only for the new hosts).
- The certificates are rotated before they expire.
Using Ambari, TLS can be enabled using these steps in the Hortonworks Data Platform (HDP). In Cloudera Manager(CM), TLS can be enabled manually using these steps. Historically, this has been the standard procedure for implementing TLS on CDH distribution.
Auto-TLS feature in Cloudera Manager
The process described above can be a significant effort in large deployments, often leading to long deployment times and operational difficulties. The Auto-TLS feature automates all the steps required to enable TLS encryption at a cluster level. Using Auto-TLS, you can let Cloudera manage the Certificate Authority (CA) for all the certificates in the cluster or use the company’s existing CA. In most cases, all the necessary steps can be enabled easily via the Cloudera Manager UI. This feature automates the following processes –
- When Cloudera Manager is used as a Certificate Authority –
- Creates the root Certificate Authority or a Certificate Signing Request (CSR) for creating an intermediate Certificate Authority to be signed by company’s existing Certificate Authority (CA)
- Generates the CSRs for hosts and signs them automatically
- The following steps are always performed
- Creates a keystore and truststore for hosts.
- Deploys the certificates, keystore and truststore to all the hosts in the cluster.
- All the cluster services are then automatically TLS enabled by configuring the keystore and truststore information from a role instance specific directory.
- Enables TLS for Cloudera Manager server and agents.
- After this initial setup, any new service, hosts (or) additional compute clusters setup are automatically TLS enabled by default.
- Provides an automation framework for rotating certificates.
The Auto-TLS feature is akin to how kube master can now self-sign node certificates on a vanilla Kubernetes cluster, the bonus with CM is that it goes one step above to secure the cluster services as well. Here is the link to the official documentation. Let us review these options with examples below on a CDP DC 7.1 cluster.
Option 1 – Use Cloudera Manager to generate an internal Certificate Authority and corresponding certificates
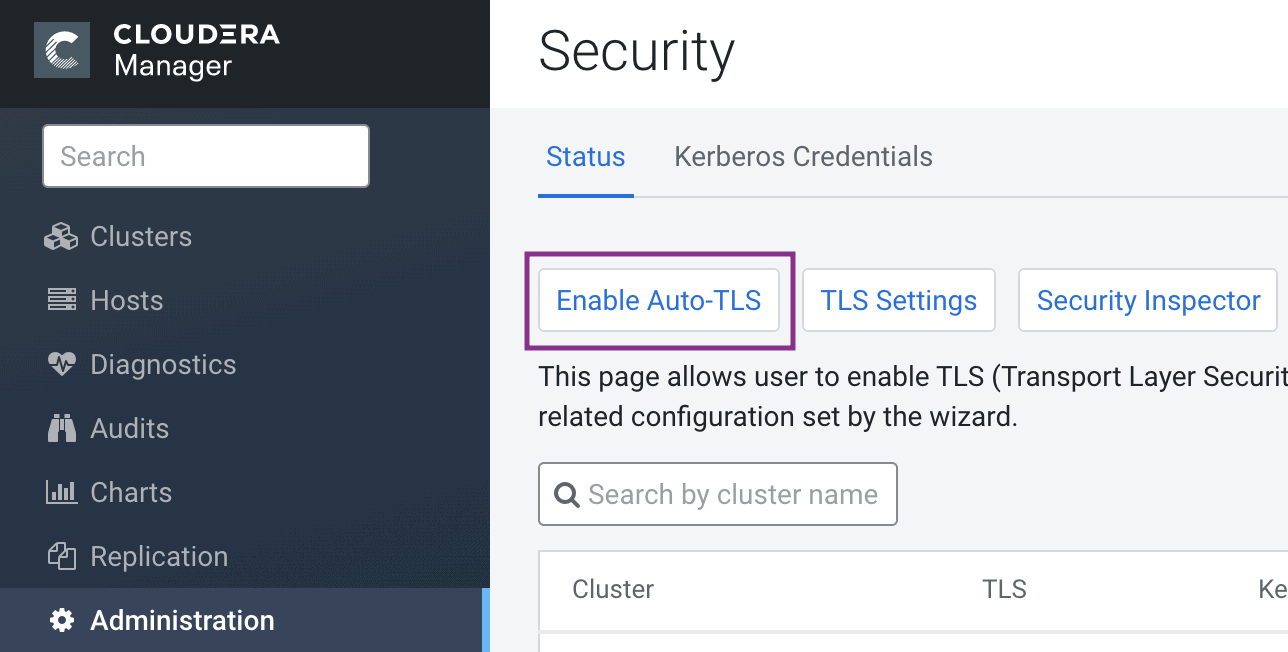
The simplest option is to let Cloudera Manager create and manage its own Certificate Authority. To choose this option, from Cloudera Manager go to Administration > Security > Enable Auto-TLS and complete the wizard.
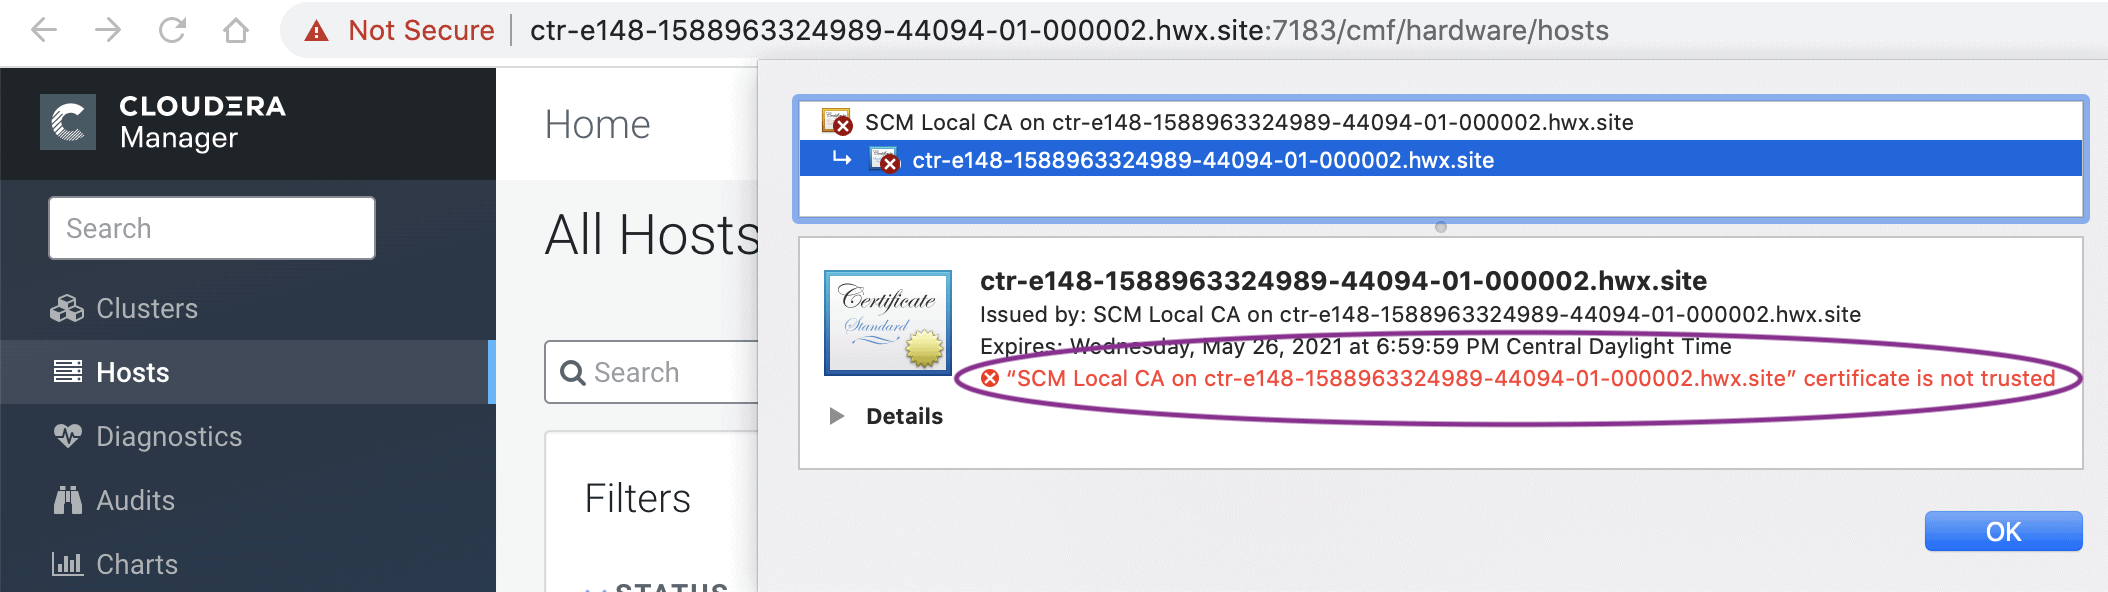
You will be prompted to start the Cloudera Manager, followed by Cloudera management services and any impacted clusters. When you start the Cloudera Manager server, you should see the UI at the TLS port 7183 by default. The browser will show a self-signed certificate from the SCM Local CA authority, as shown below. The browser shows a warning because it is not aware of the Root CA generated by CM. When the Root CA is imported into the client browser’s truststore, this warning will not be shown by the browser.
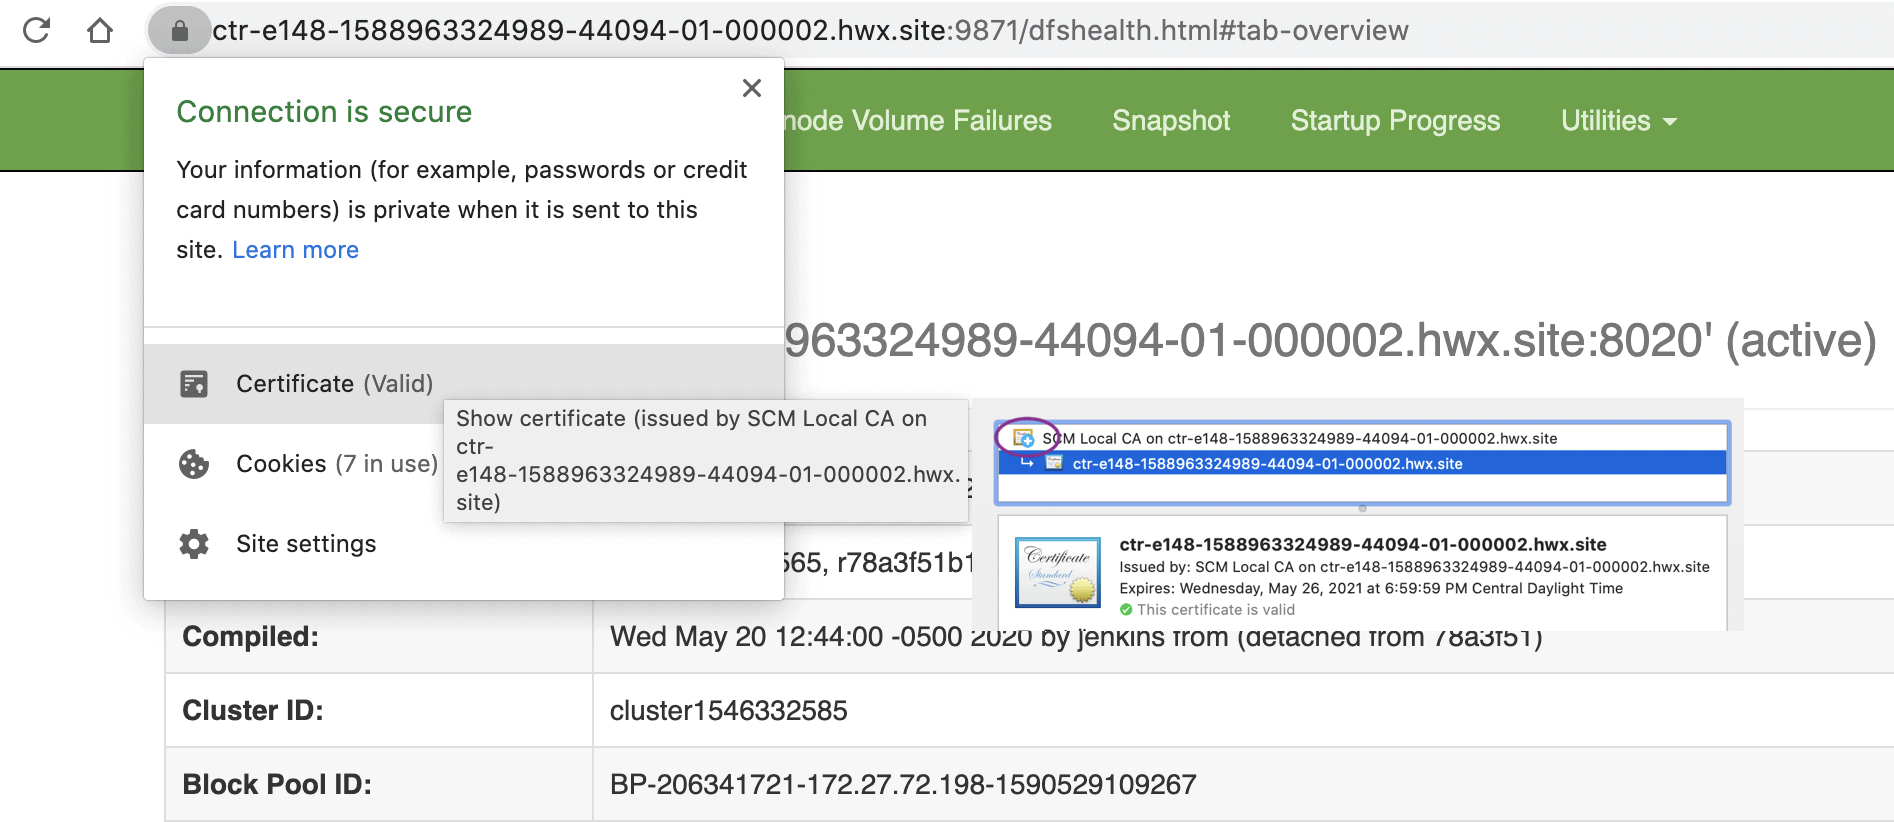
When you set up the cluster, you should see a message stating that Auto-TLS is already enabled. Continue to install the required services. Voila! The whole cluster is TLS encrypted. Any new hosts or services are automatically configured. Here is an example of HDFS service with TLS encryption enabled by default (after trusting the root certificate generated by Cloudera Manager).
While this option is the simplest, it may not be suitable for some enterprise deployments where TLS certificates are issued by the company’s existing Certificate Authority (CA) to maintain a centralized chain of trust.
Option 2 – Use an existing Certificate Authority
You can make the Cloudera Manager CA an intermediate CA to an existing Root CA or you can manually generate the certificates signed by an existing Root CA and upload them to Cloudera Manager. These two options are described as 2a and 2b below.
Option 2a – Enabling Auto-TLS with an Existing Root CA
For new installations only, you can make Cloudera Manager an intermediate CA that signs certificates for all the cluster hosts and services. This is a three-step process. First, make Cloudera Manager generate a Certificate Signing Request (CSR). Second, have the CSR signed by the company’s Certificate Authority (CA). Third, provide the signed certificate chain to continue the Auto-TLS setup. The following example demonstrates these three steps.
1. Initialize the certmanager with –stop-at-csr option before starting the Cloudera Manager.
JAVA_HOME=/usr/lib/jvm/java-1.8.0-openjdk; /opt/cloudera/cm-agent/bin/certmanager --location /var/lib/cloudera-scm-server/certmanager setup --configure-services --stop-at-csr
2. This will generate a Certificate signing request (CSR) file at /var/lib/cloudera-scm-server/certmanager/CMCA/private/ca_csr.pem. If you examine the CSR closely you will see the CSR request the necessary extension X509v3 Key Usage: critical Certificate Sign to sign certificates on its own.
3. Once you have the signed certificate, make sure that the certificate has the required extensions – X509v3 Basic Constraints: CA: TRUE and X509v3 Key Usage: Key Cert Sign. Proceed with the installation with the following command.
JAVA_HOME=/usr/lib/jvm/java-1.8.0-openjdk; /opt/cloudera/cm-agent/bin/certmanager --location /var/lib/cloudera-scm-server/certmanager setup --configure-services --signed-ca-cert=cm_cert_chain.pem
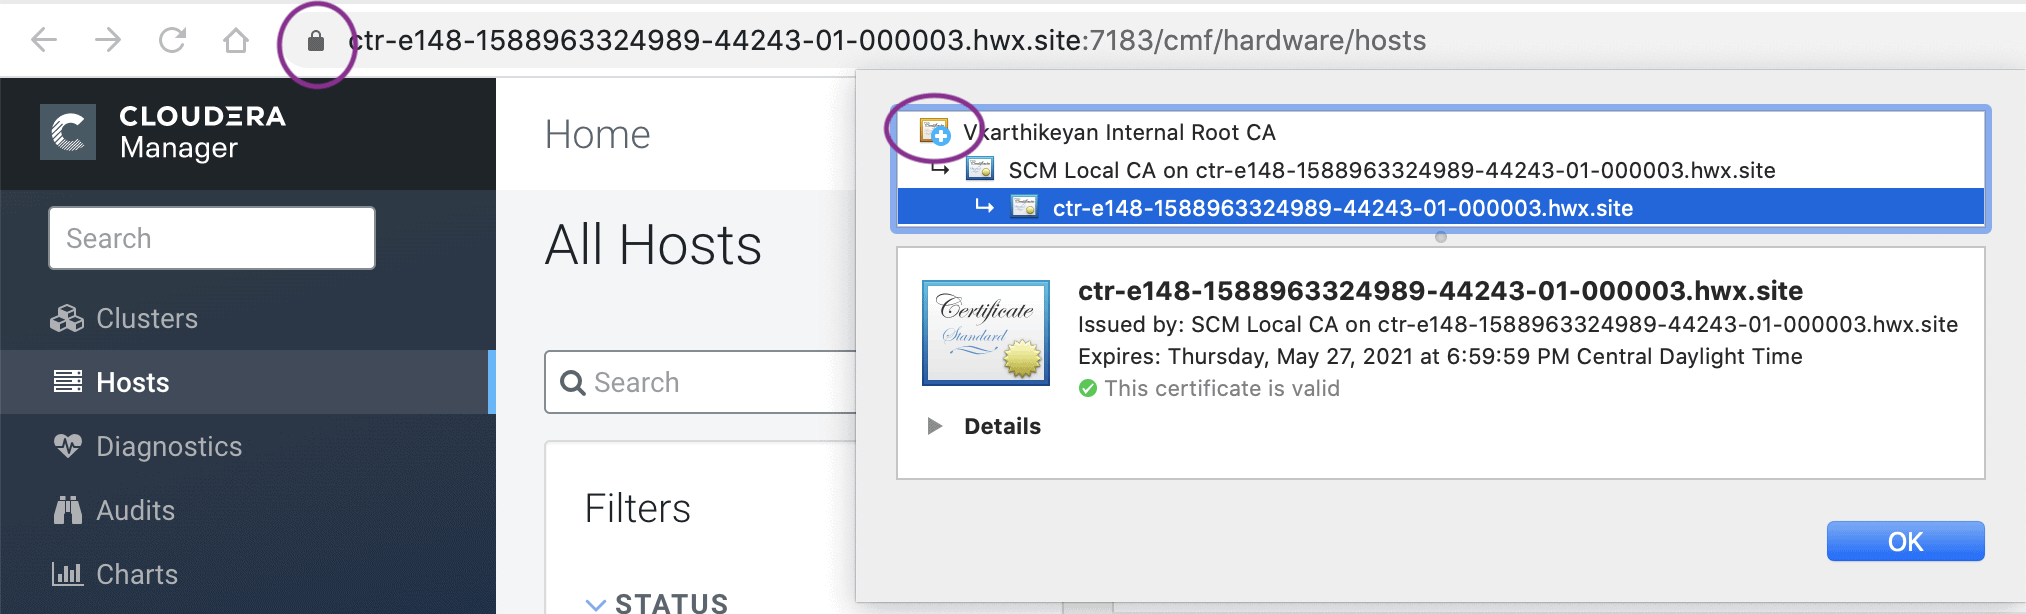
Start Cloudera Manager and it should start with its UI on TLS port 7183. If the signed intermediate certificate is already imported into the client browser’s truststore, then you should not see any warnings. In the screenshot below, “Vkarthikeyan Internal Root CA” is the root certificate. This certificate is already trusted by the system and has signed the Cloudera intermediate CA.
Option 2b – Enabling Auto-TLS with Existing Certificates
Use the following approach if you have an existing cluster where you need to enable Auto-TLS, or if there is a need to get the host certificates signed individually by the company’s existing CA. This option adds operational overhead of generating certificates for any new hosts and uploading to Cloudera Manager via API request. In this option, certificates signed by CA are staged and the Auto-TLS is enabled by calling a Cloudera Manager API.
1. Create the Auto-TLS directory /opt/cloudera/AutoTLS in the Cloudera Manager server. The directory must be owned by the cloudera-scm user.
2. Create a public/private key for each host and generate the corresponding Certificate Signing request (CSR). Have these CSRs signed by the company’s Certificate Authority (CA).
3. Prepare all the certificates signed by the company’s CA on the CM server. In this example, all the certificates are located under the /tmp/auto-tls directory. The password used for keystore and truststore are present in key.pwd and truststore.pwd files respectively.
4. Run the Cloudera Manager API as follows
curl -i -v -uadmin:admin -X POST --header 'Content-Type: application/json' --header 'Accept: application/json' -d '{

"location" : "/opt/cloudera/AutoTLS",

"customCA" : true,

"interpretAsFilenames" : true,

"cmHostCert" : "/tmp/auto-tls/certs/ccycloud-7.vcdp71.root.hwx.site.pem",

"cmHostKey" : "/tmp/auto-tls/keys/ccycloud-7.vcdp71.root.hwx.site-key.pem",

"caCert" : "/tmp/auto-tls/ca-certs/cfssl-chain-truststore.pem",

"keystorePasswd" : "/tmp/auto-tls/keys/key.pwd",

"truststorePasswd" : "/tmp/auto-tls/ca-certs/truststore.pwd",

"hostCerts" : [ {

"hostname" : "ccycloud-7.vcdp71.root.hwx.site",

"certificate" : "/tmp/auto-tls/certs/ccycloud-7.vcdp71.root.hwx.site.pem",

"key" : "/tmp/auto-tls/keys/ccycloud-7.vcdp71.root.hwx.site-key.pem"

}, {

"hostname" : "ccycloud-3.vcdp71.root.hwx.site",

"certificate" : "/tmp/auto-tls/certs/ccycloud-3.vcdp71.root.hwx.site.pem",

"key" : "/tmp/auto-tls/keys/ccycloud-3.vcdp71.root.hwx.site-key.pem"

}, {

"hostname" : "ccycloud-2.vcdp71.root.hwx.site",

"certificate" : "/tmp/auto-tls/certs/ccycloud-3.vcdp71.root.hwx.site.pem",

"key" : "/tmp/auto-tls/keys/ccycloud-3.vcdp71.root.hwx.site-key.pem"

}, {

"hostname" : "ccycloud-1.vcdp71.root.hwx.site",

"certificate" : "/tmp/auto-tls/certs/ccycloud-1.vcdp71.root.hwx.site.pem",

"key" : "/tmp/auto-tls/keys/ccycloud-1.vcdp71.root.hwx.site-key.pem"

} ],

"configureAllServices" : "true",

"sshPort" : 22,

"userName" : "root",

"password" : "cloudera"

}' 'http://ccycloud-7.vcdp71.root.hwx.site:7180/api/v41/cm/commands/generateCmca'
5. When this API returns successfully, you should see the recent command run as follows.

6. When this API is executing you can check /var/log/cloudera-scm-server/cloudera-scm-server.log for API logs and also the certmanager logs at /var/log/cloudera-scm-agent/certmanager.log.
7. Restart the CM service. Then restart the CM agents on all cluster servers
8. The CM UI/API will now be available on the TLS port. Now restart all the Cloudera Manager management services.
9. Restart the Cluster services. Now all the services are configured for wire encryption.
10. When adding new hosts to this cluster, the following additional steps need to be performed to upload the CA signed host certificates to CM.
-
- The add hosts wizard will prompt the following screen with instructions to upload the certificates.
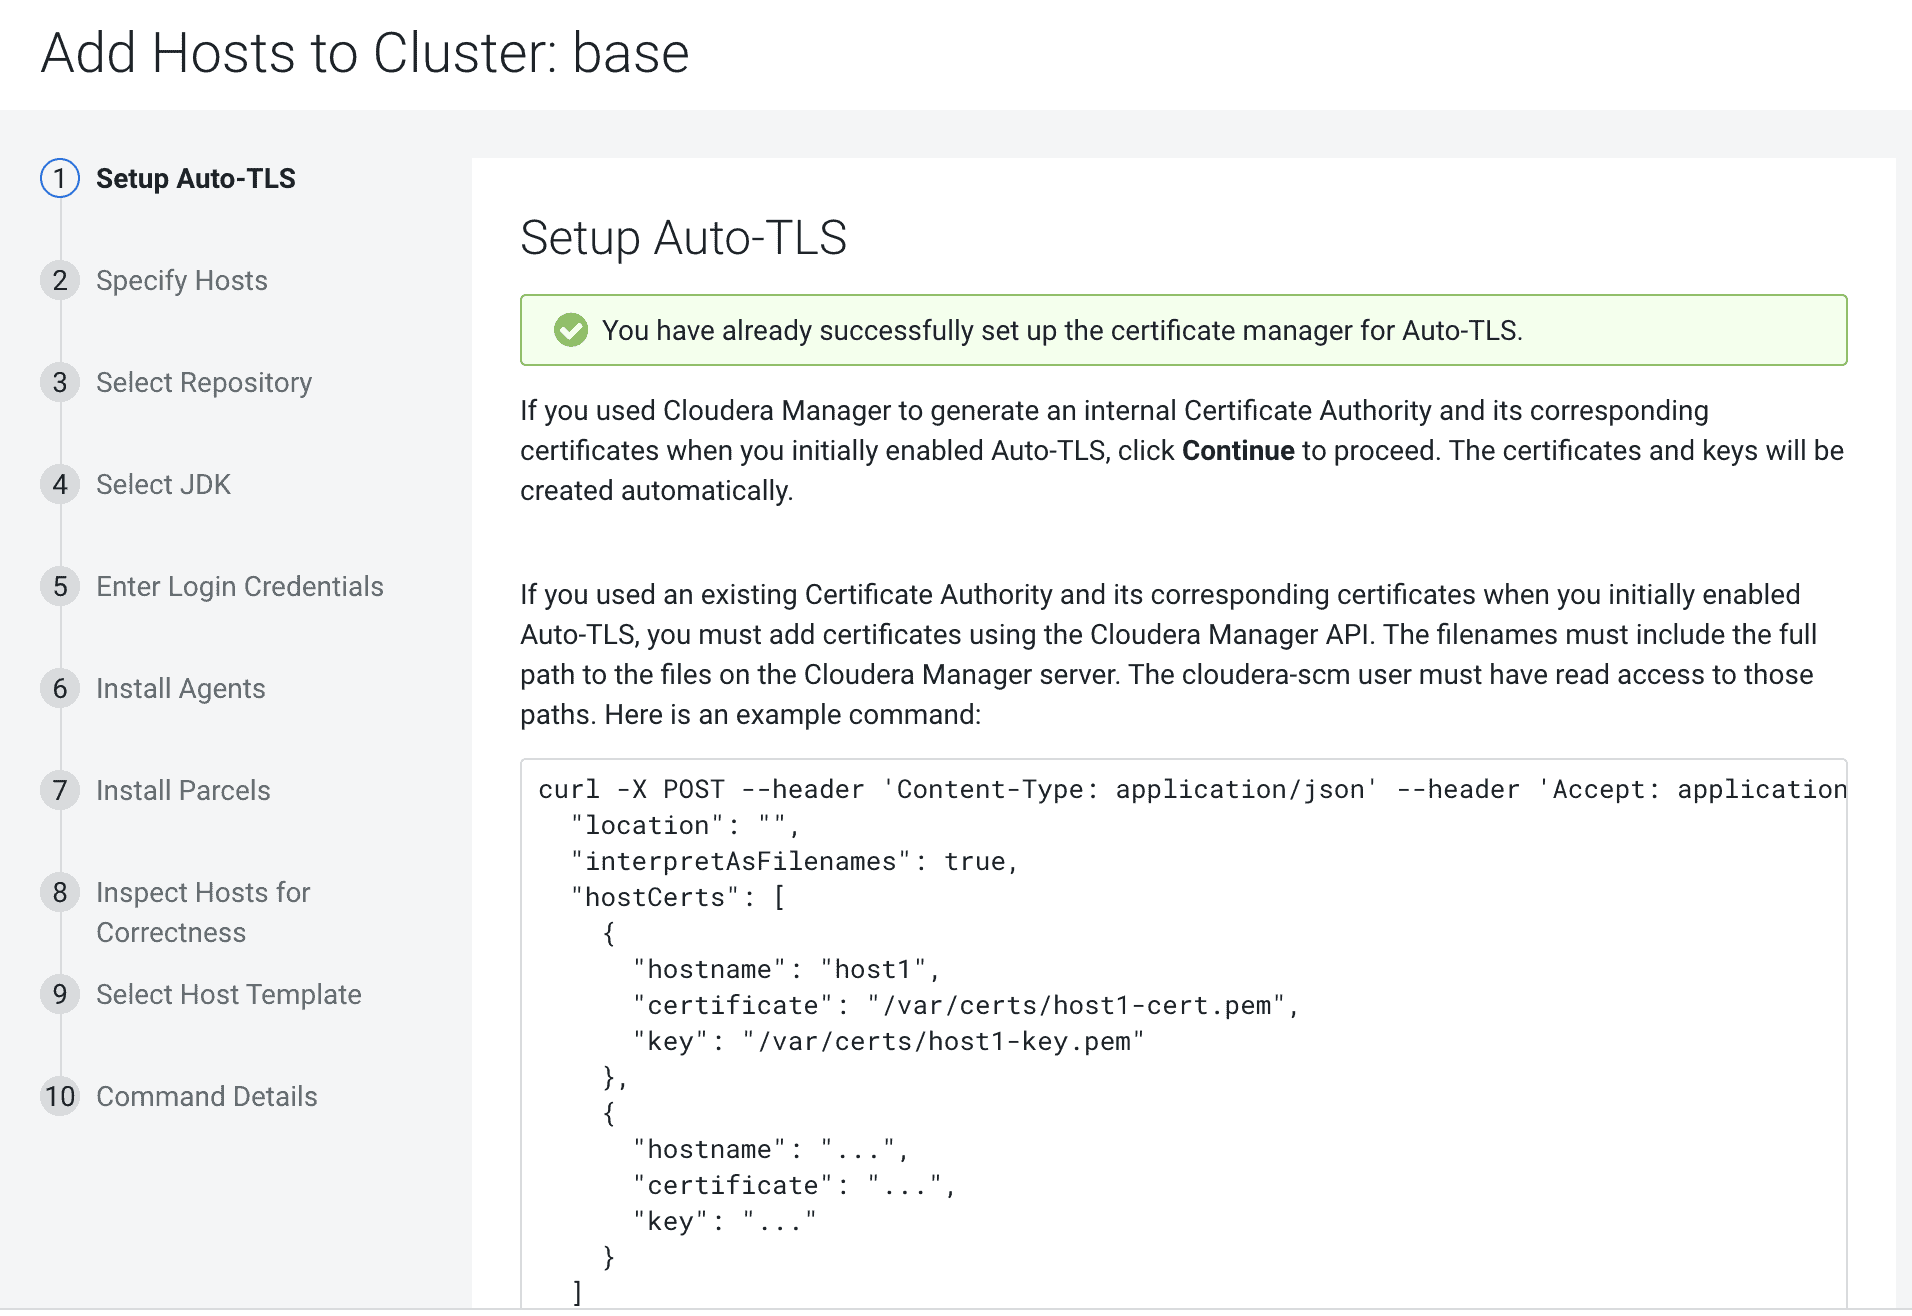
- Upload the certificates to CM using the following command.
- The add hosts wizard will prompt the following screen with instructions to upload the certificates.
-
curl -uadmin:admin -X POST --header 'Content-Type:
application/json' --header 'Accept: application/json' -d '{
  "location": "/opt/cloudera/AutoTLS",
  "interpretAsFilenames": true,
  "hostCerts": [ {
      "hostname": "ccycloud-10.vcdp71.root.hwx.site",
      "Certificate":
"/tmp/auto-tls/certs/ccycloud-10.vcdp71.root.hwx.site.pem",
      "Key":
"/tmp/auto-tls/certs/ccycloud-10.vcdp71.root.hwx.site.pemm"
    } ]
}' 'https://ccycloud-7.vcdp71.root.hwx.site:7183/api/v41/cm/commands/addCustomCerts'
- Continue to add hosts as usual.
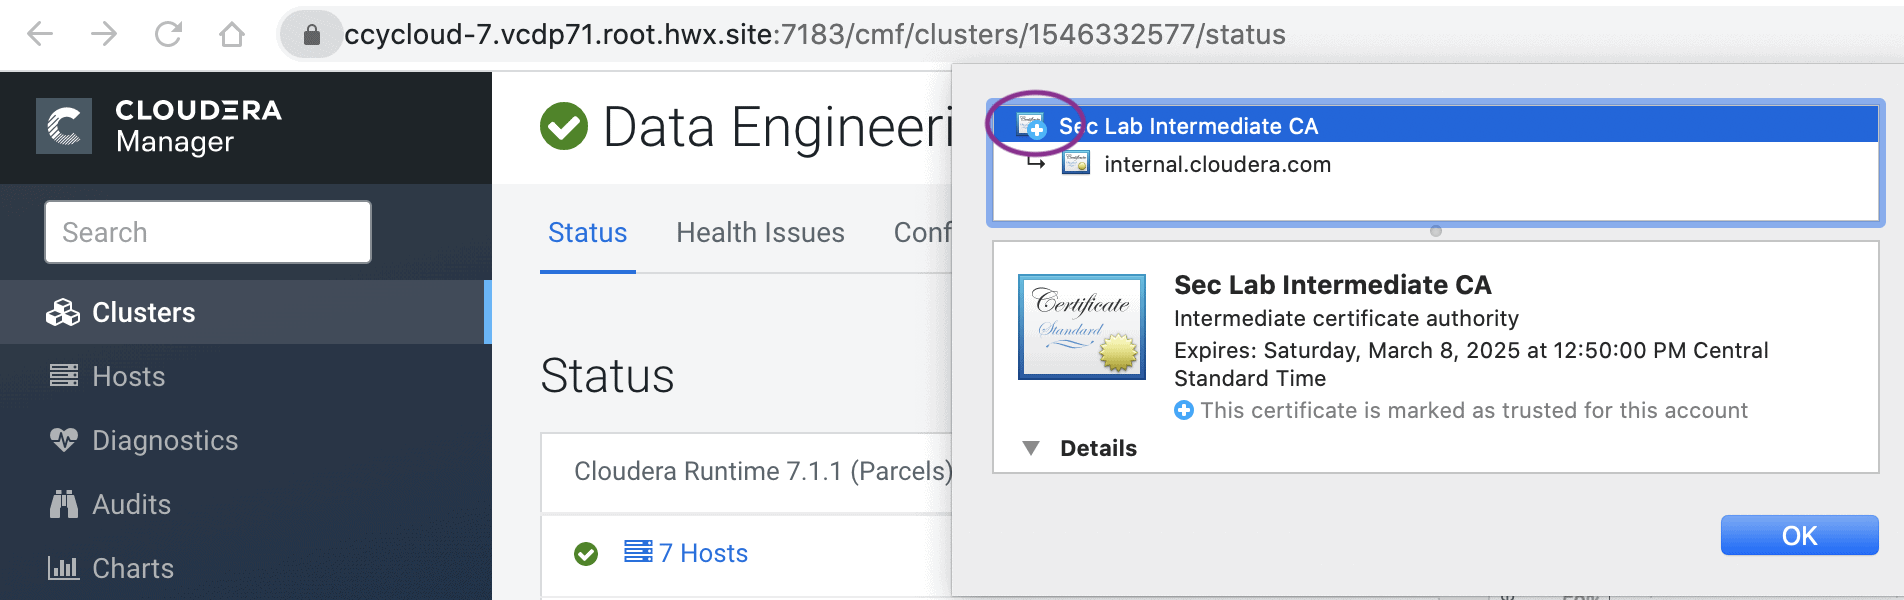
In this example, the CA used to sign all the certificates is “Sec Lab Intermediate CA” which can be found in the screenshot below –
Cloudera Manager UI
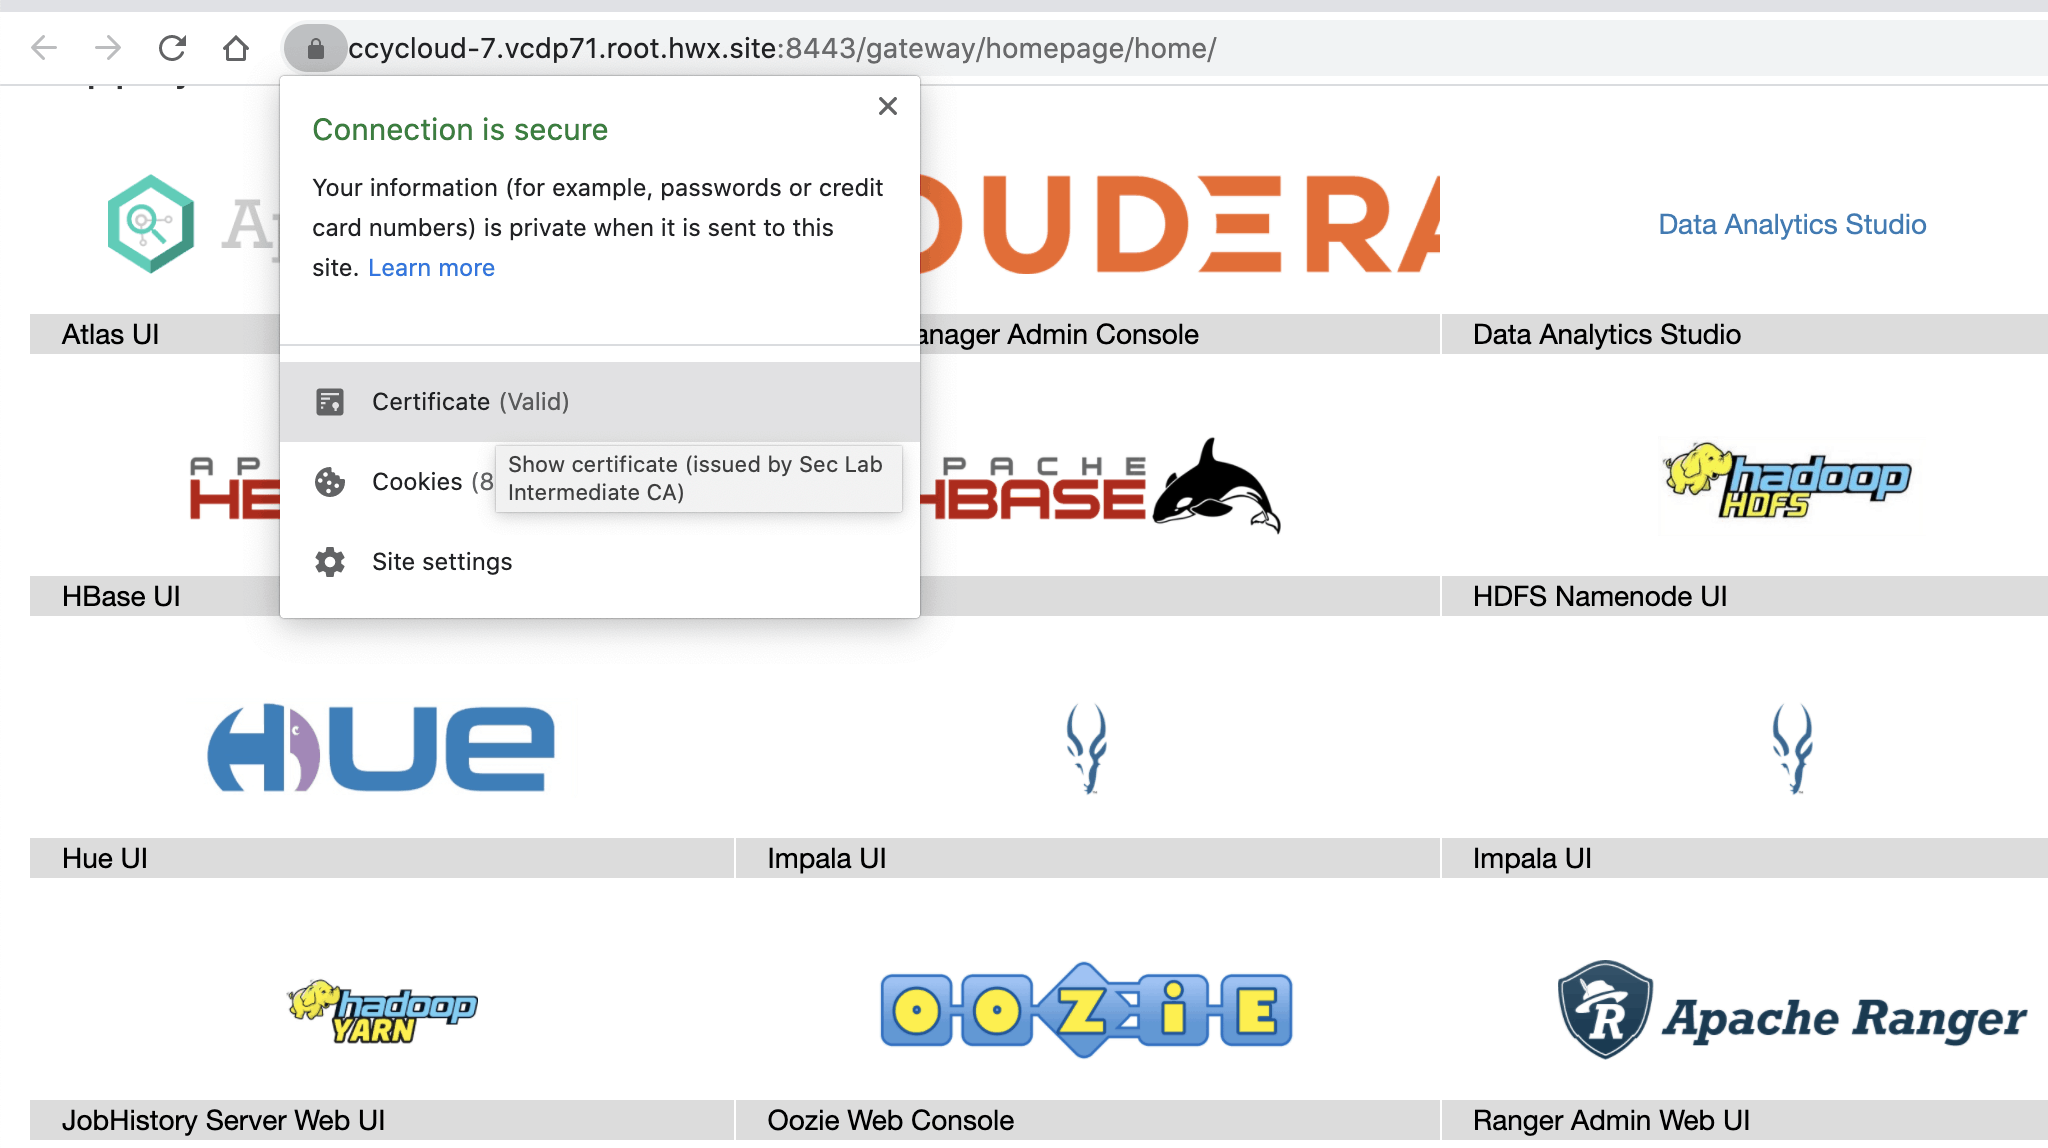
Knox UI
New Cluster deployment
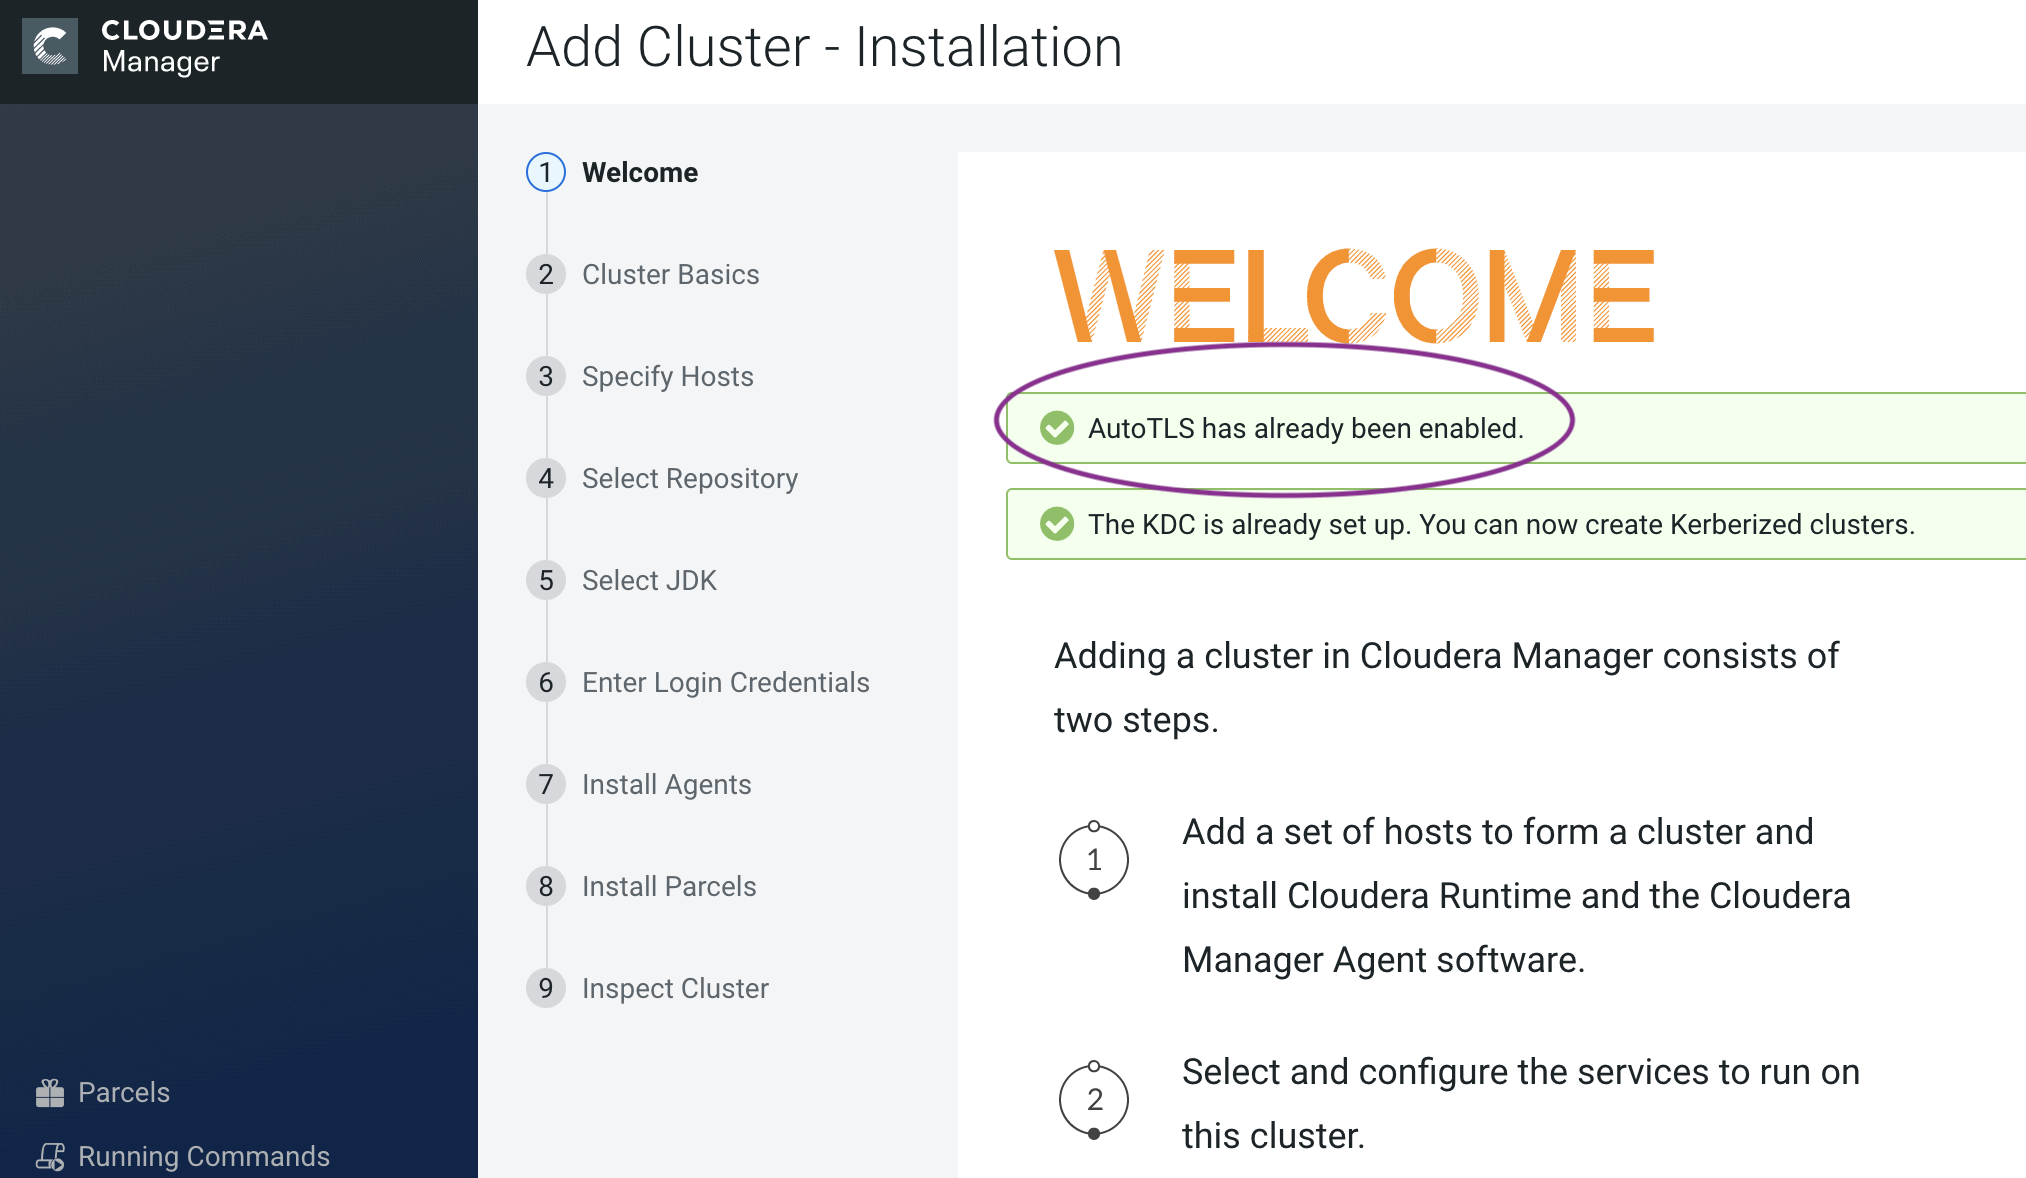
With any of the above options, you can reuse the existing TLS settings when creating a new cluster on a CM with Auto-TLS enabled. When you launch the wizard to create a new cluster you should see the following message. Now, when you deploy the cluster, all services will be automatically configured with wire encryption.
Summary
The Auto-TLS functionality not only speeds up the initial setup of the wire encryption but also automates future TLS configuration steps for the cluster. The following table summarizes the differences between the options described in this blog.
| Steps | HDP/EDH (manual) | CDP DC
Option 1 |
CDP DC
Option 2a |
CDP DC
Option 2b |
| Generate CSR | Manual | Automated | Automated | Manual |
| CSR Signed by CA | Manual | Automated | One-time | Manual |
| Deploy certificate to all hosts | Manual | Automated | Automated | Automated |
| Configuration for each service | Manual | Automated | Automated | Automated |
| Cluster restarts | Multiple | Once | Once | Once |
| Configuration steps | Manual | Automated | Automated | Automated |
| New Service steps | Manual | Automated | Automated | Automated |
| New Host cert. generation | Manual | Automated | Automated | Manual |
The Auto-TLS feature significantly reduces the overhead of TLS management of your cluster, thus providing increased security with reduced operational overhead and helps you stay focused on your customers and their workloads. Like what you see? Try out the new Cloudera Data Platform Data Center today!
Editor's Choice


when installing cdp7.1.6 from scratch & desiring to enable auto-tls, your instructions say to use cdm but cdm is not running during this early phase(step3) of the install & it will not stay up once started. can auto-tls be enable via the CLI, & if so how?
@shane it sounds like you are following the instructions for Option 2b – Enabling Auto-TLS with Existing Certificates, in which case Cloudera Manager must be running first. If Cloudera Manager is not able to be started there is likely an issue with the prerequisites, which you can find in the product documentation. There is also a reference guide for the certmanager CLI available in the CDP documentation.
Is this feature available in trial version to test?