Lost in the talk about OpenAI is the tremendous amount of compute needed to train and fine-tune LLMs, like GPT, and Generative AI, like ChatGPT. Each iteration requires more compute and the limitation imposed by Moore’s Law quickly moves that task from single compute instances to distributed compute. To accomplish this, OpenAI has employed Ray to power the distributed compute platform to train each release of the GPT models. Ray has emerged as a popular framework because of its superior performance over Apache Spark for distributed AI compute workloads. In the blog we will cover how Ray can be used in Cloudera Machine Learning’s open-by-design architecture to bring fast distributed AI compute to CDP. This is enabled through a Ray Module in cmlextensions python package published by our team.
Ray’s ability to provide simple and efficient distributed computing capabilities, along with its native support for Python, has made it a favorite among data scientists and engineers alike. Its innovative architecture enables seamless integration with ML and deep learning libraries like TensorFlow and PyTorch. Furthermore, Ray’s unique approach to parallelism, which focuses on fine-grained task scheduling, enables it to handle a wider range of workloads compared to Spark. This enhanced flexibility and ease of use have positioned Ray as the go-to choice for organizations looking to harness the power of distributed computing.
Built on Kubernetes, Cloudera Machine Learning (CML) gives data science teams a platform that works across each stage of Machine Learning Lifecycle, supporting exploratory data analysis, the model development and moving those models and applications to production (aka MLOps). CML is built to be open by design, and that is why it includes a Worker API that can quickly spin up multiple compute pods on demand. Cloudera customers are able to bring together CML’s ability to spin up large compute clusters and integrate that with Ray to enable an easy to use, Python native, distributed compute platform. While Ray brings some of its own libraries for reinforcement learning, hyper parameter tuning, and model training and serving, users can also bring their favorite packages like XGBoost, Pytorch, LightGBM, Dask, and Pandas (using Modin). This fits right in with CML’s open by design, allowing data scientists to be able to take advantage of the latest innovations coming from the open-source community.
To make it easier for CML users to leverage Ray, Cloudera has published a Python package called CMLextensions. CMLextensions has a Ray module that manages provisioning compute workers in CML and then returning a Ray cluster to the user.
To get started with Ray on CML, first you need to install the CMLextensions library.

With that in place, we can now spin up a Ray cluster.
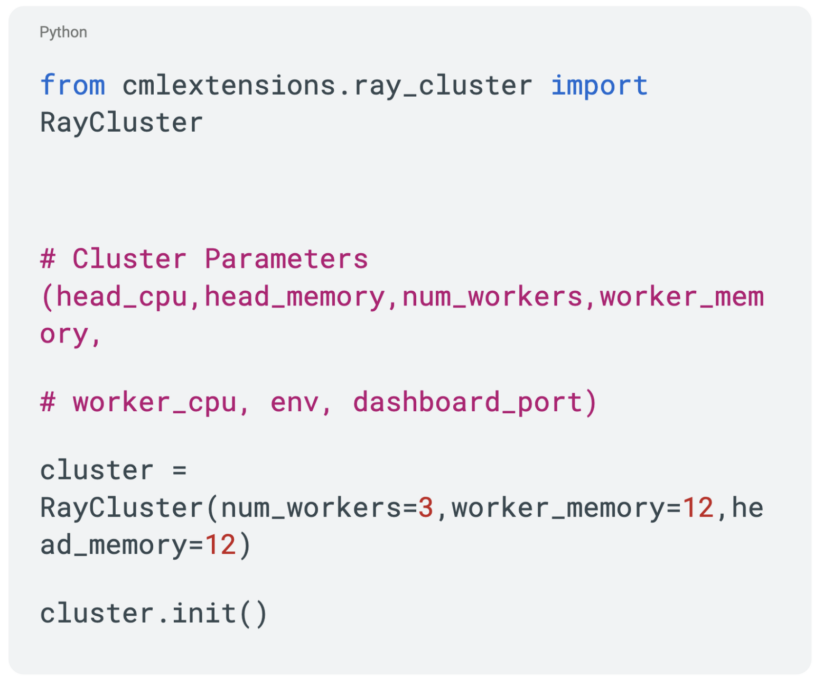
This returns a provisioned Ray cluster.

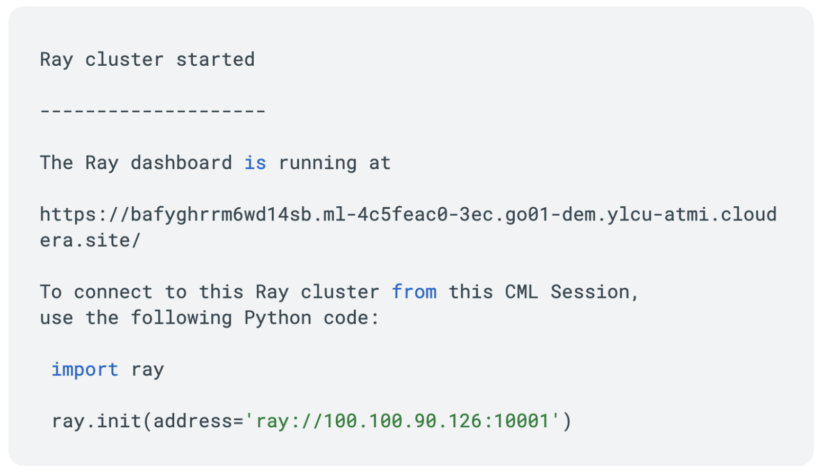
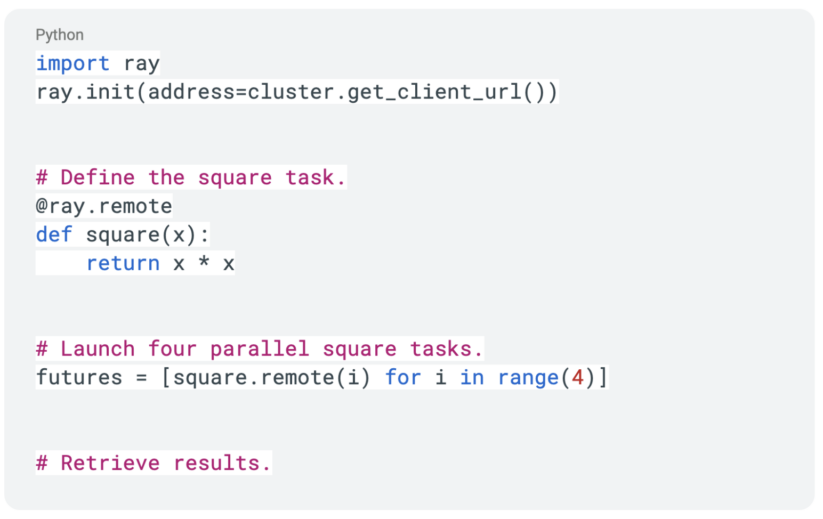
Now we have a Ray cluster provisioned and we are ready to get to work. We can test out our Ray cluster with the following code:

Finally, when we are done with the Ray cluster, we can terminate it with:

Ray lowers the barriers to build fast and distributed Python applications. Now we can spin up a Ray cluster in Cloudera Machine Learning. Let’s check out how we can parallelize and distribute Python code with Ray. To best understand this, we need to look at Ray Tasks and Actors, and how the Ray APIs allow you to implement distributed compute.
First, we will look at the concept of taking an existing function and making it into a Ray Task. Lets look at a simple function to find the square of a number.


To make this into a remote function, all we need to do is use the @ray.remote decorator.

This makes it a remote function and calling the function immediately returns a future with the object reference.

In order to get the result from our function call, we can use the ray.get API call with the function which would result in execution being blocked until the result of the call is returned.

Building off of Ray Tasks, we next have the concept of Ray Actors to explore. Think of an Actor as a remote class that runs on one of our worker nodes. Lets start with a simple class that tracks test scores. We will use that same @ray.remote decorator which this time turns this class into a Ray Actor.
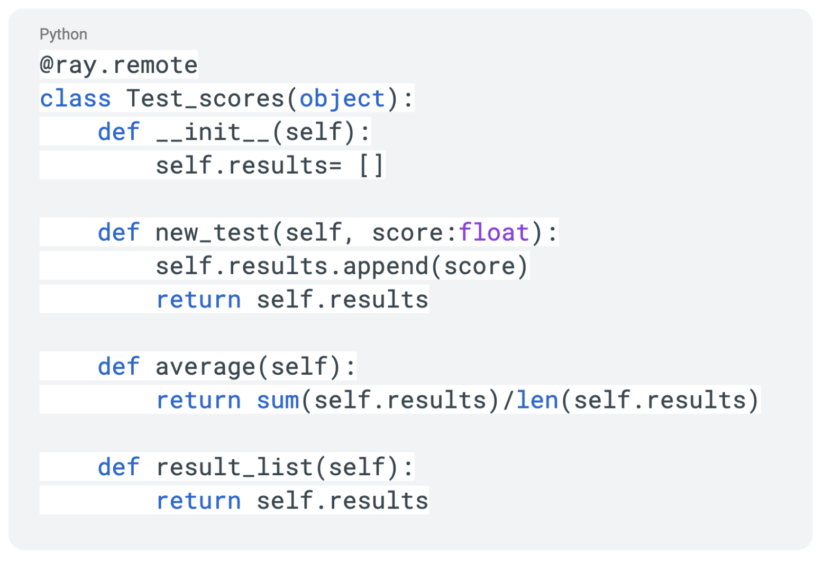
Next, we will create an instance of this Actor.

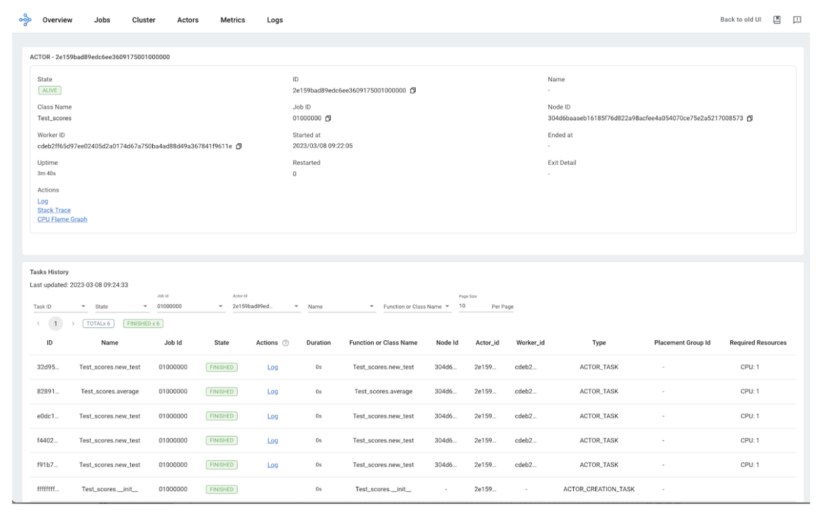
With this Actor deployed, we can now see the instance in the Ray Dashboard.

Just like with Ray Tasks, we will use the “.remote” extension to make function calls within our Ray Actor.
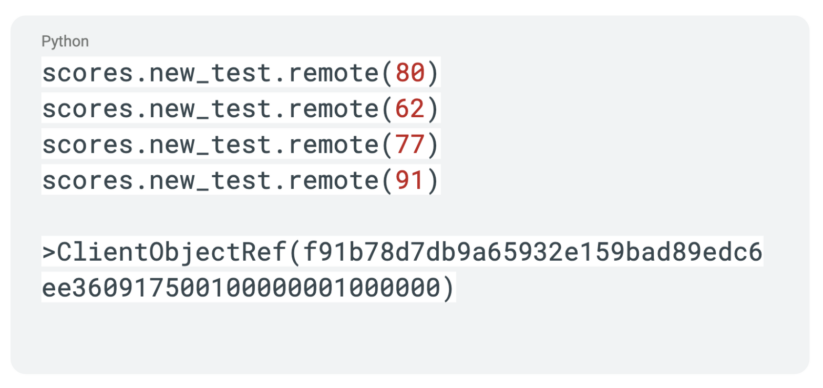
Similar to the Ray Task, calls to a Ray Actor will only result in an object reference being returned. We can use that same ray.get api call to block execution until data is returned.

The calls into our Actor also become trackable in the Ray Dashboard. Below you will see our actor, you can trace all of the calls to that actor, and you have access to logs for that worker.
An Actor’s lifetime can be detached from the current job and allowing it to persist afterwards. Through the ray.remote decorator, you can specify the resource requirements for Actors.

This is just a quick look at the Task and Actor concepts in Ray. We are just scratching the surface here but this should give a good foundation as we dive deeper into Ray. In the next installment, we will look at how Ray becomes the foundation to distribute and speed up dataframe workloads.
Enterprises of every size and industry are experimenting and capitalizing on the innovation with LLMs that can power a variety of domain specific applications. Cloudera customers are well prepared to leverage next generation distributed compute frameworks like Ray right on top of their data. This is the power of being open by design.
To learn more about Cloudera Machine Learning please visit the website and to get started with Ray in CML check out CMLextensions in our Github.


