Cloudera Manager 4.7 added support for managing Cloudera Search 1.0. Thus Cloudera Manager users can easily deploy all components of Cloudera Search (including Apache Solr) and manage all related services, just like every other service included in CDH (Cloudera’s distribution of Apache Hadoop and related projects).
In this how-to, you will learn the steps involved in adding Cloudera Search to a Cloudera Enterprise (CDH + Cloudera Manager) cluster.
Installing the SOLR Parcel
In our example, the cluster uses a CDH 4.4 parcel and is running Apache ZooKeeper, HDFS, and Apache HBase services. (Parcels are a really useful way to deploy new software and do painless upgrades via Cloudera Manager.)
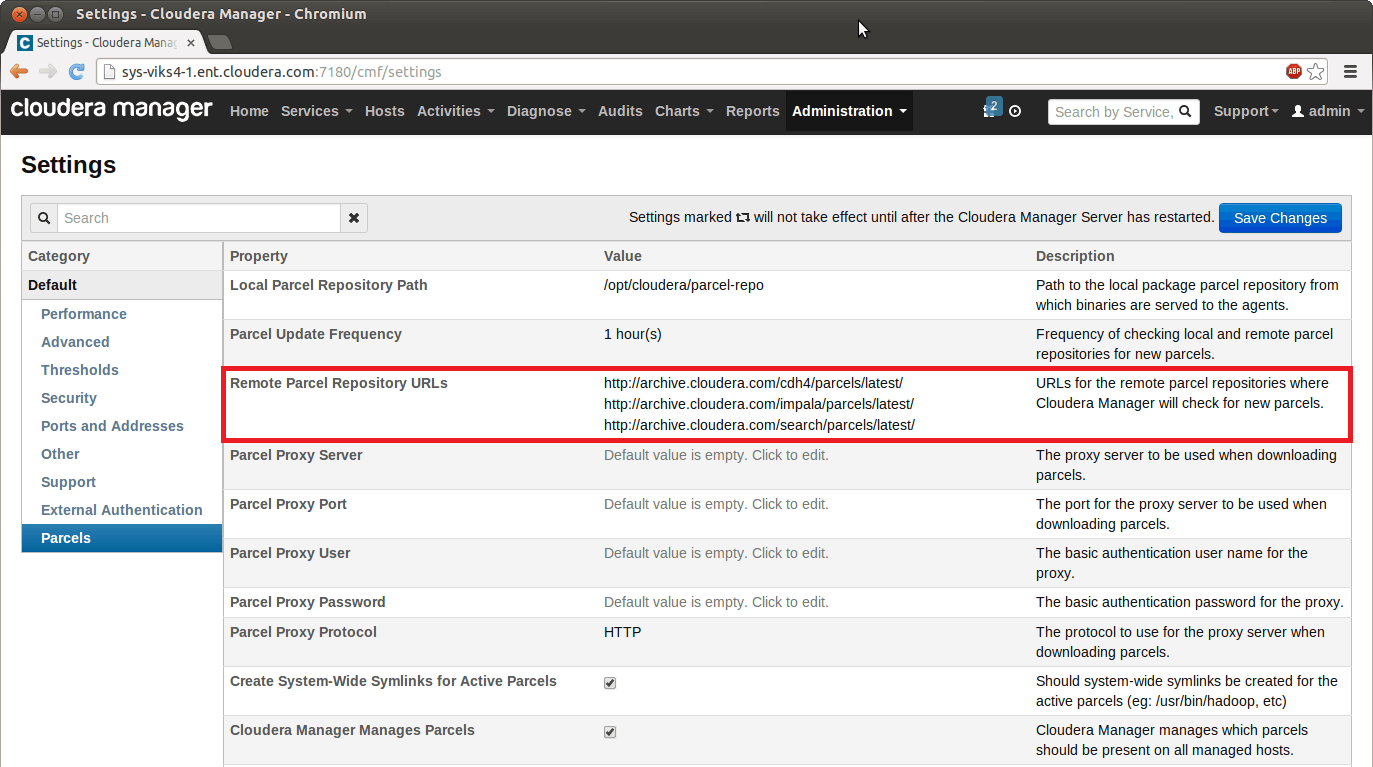
If you would like to download the SOLR parcel directly from Cloudera, you can use the default settings for “Remote Parcel Repository URLs” (under the Parcels section in the Administration tab) as shown below:
Setting the Parcel repository URL
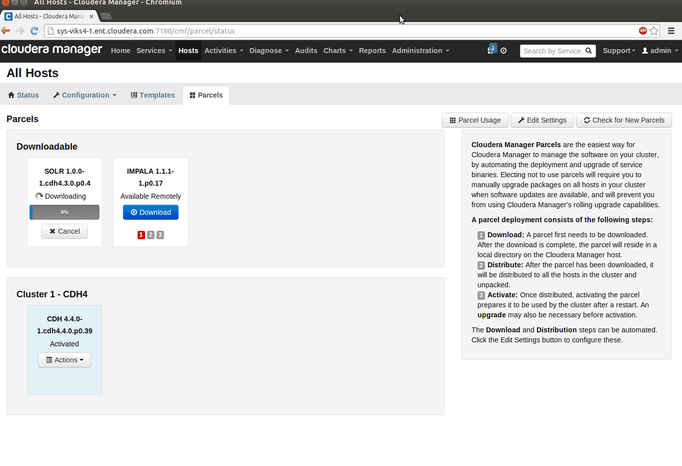
If you want to use a local repository (that is, first download the parcel from Cloudera and then install from the local copy), you can follow the instructions here. The next steps are to “Download”, “Distribute,” and “Activate” the parcel from the Parcels page on the Hosts tab.
Deploying the SOLR parcel
Once the parcel is activated, you have all components of Cloudera Search (Solr, Lily HBase Indexer, and Apache Flume’s Morphlines Sink) ready to be used along with CDH.
The next step is to add the Apache Solr service to your cluster. In the “Actions” menu of your cluster on the Services tab, choose “Add a Service,” which takes you to the “Add Service Wizard” in Cloudera Manager. Once you follow the steps in the wizard and choose where the Solr servers should run, you’ll land on a workflow page that will initialize the Solr service and start all Solr servers.
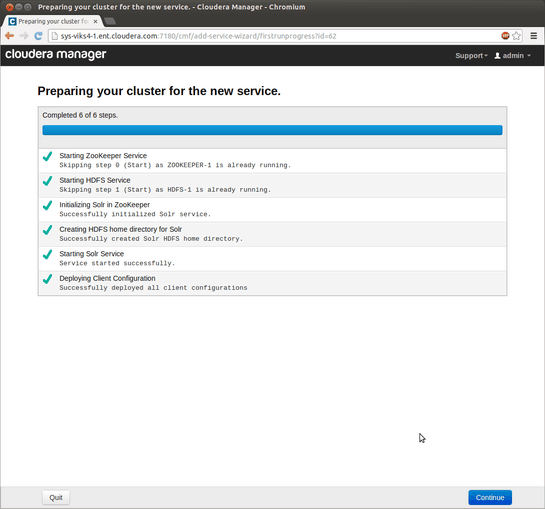
Getting the Solr service up and running
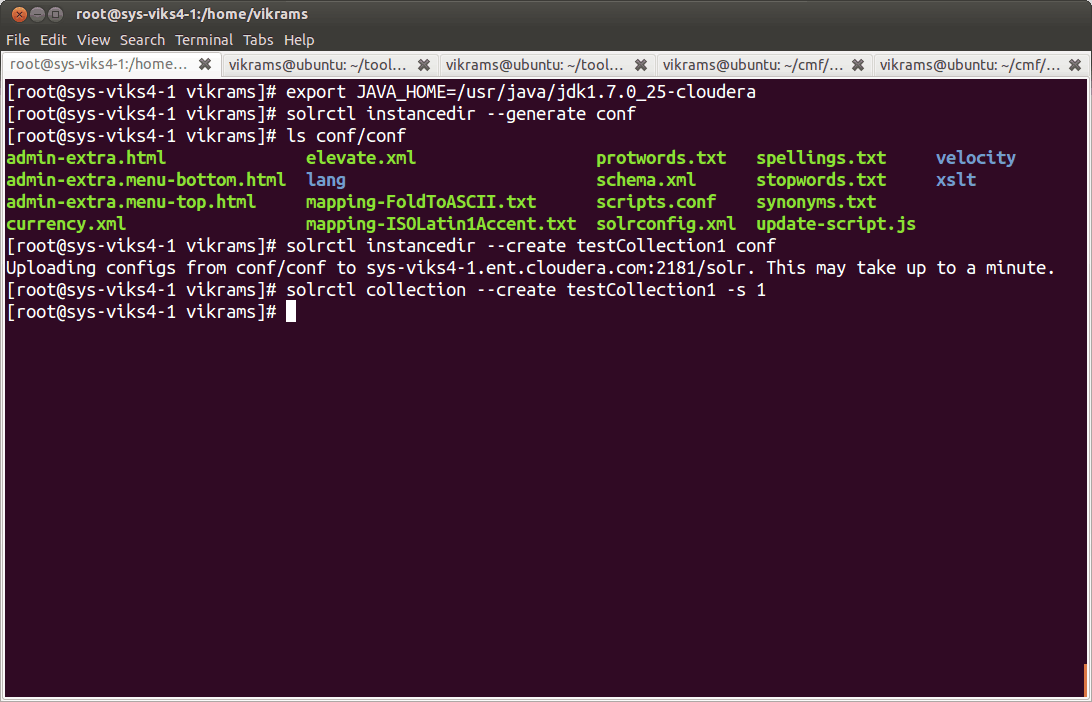
That’s it — the Solr service is now ready for use! Follow the instructions in the Cloudera Search User Guide to create collections and add documents to them for indexing. The screenshot below shows how to create a collection using the default Solr schema.
Creating the first collection
Adding Lily HBase Indexer
Cloudera Manager 4.7 also provides support for the Lily HBase Indexer included with the SOLR parcel. The Lily HBase Indexer Service is a flexible, scalable, fault tolerant, transactional, near-real time system for processing a continuous stream of HBase cell updates into live search indexes. To use it, add the “Keystore Indexer” service via the “Add Service Wizard.”
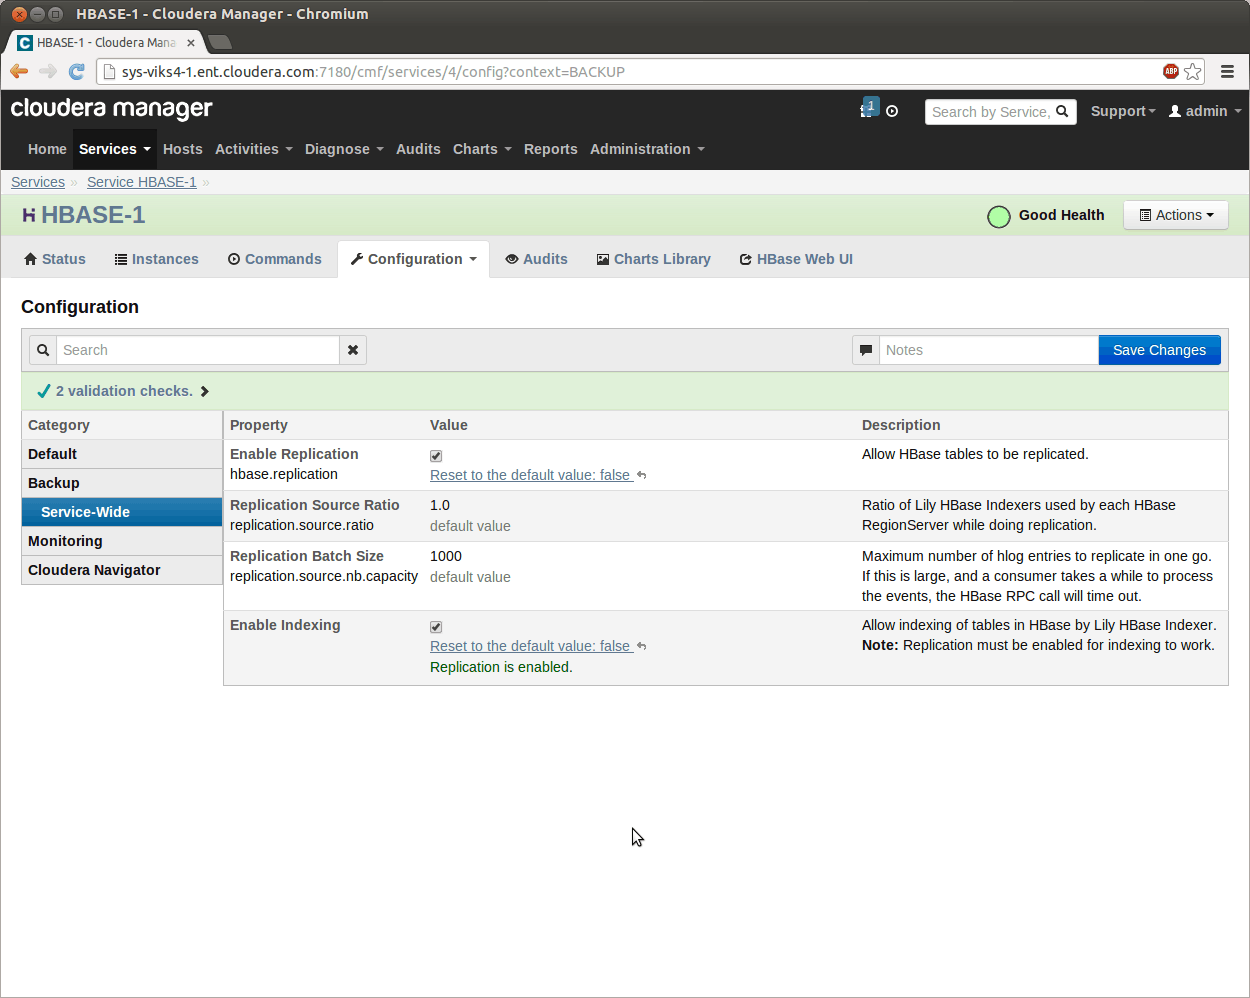
Before you can use the Lily HBase Indexer however, you need to ensure that replication and indexing are enabled in the HBase service in the cluster. You can change these properties on the HBase service configuration page under the “Backup” section.
Setting HBase properties for Lily HBase Indexer
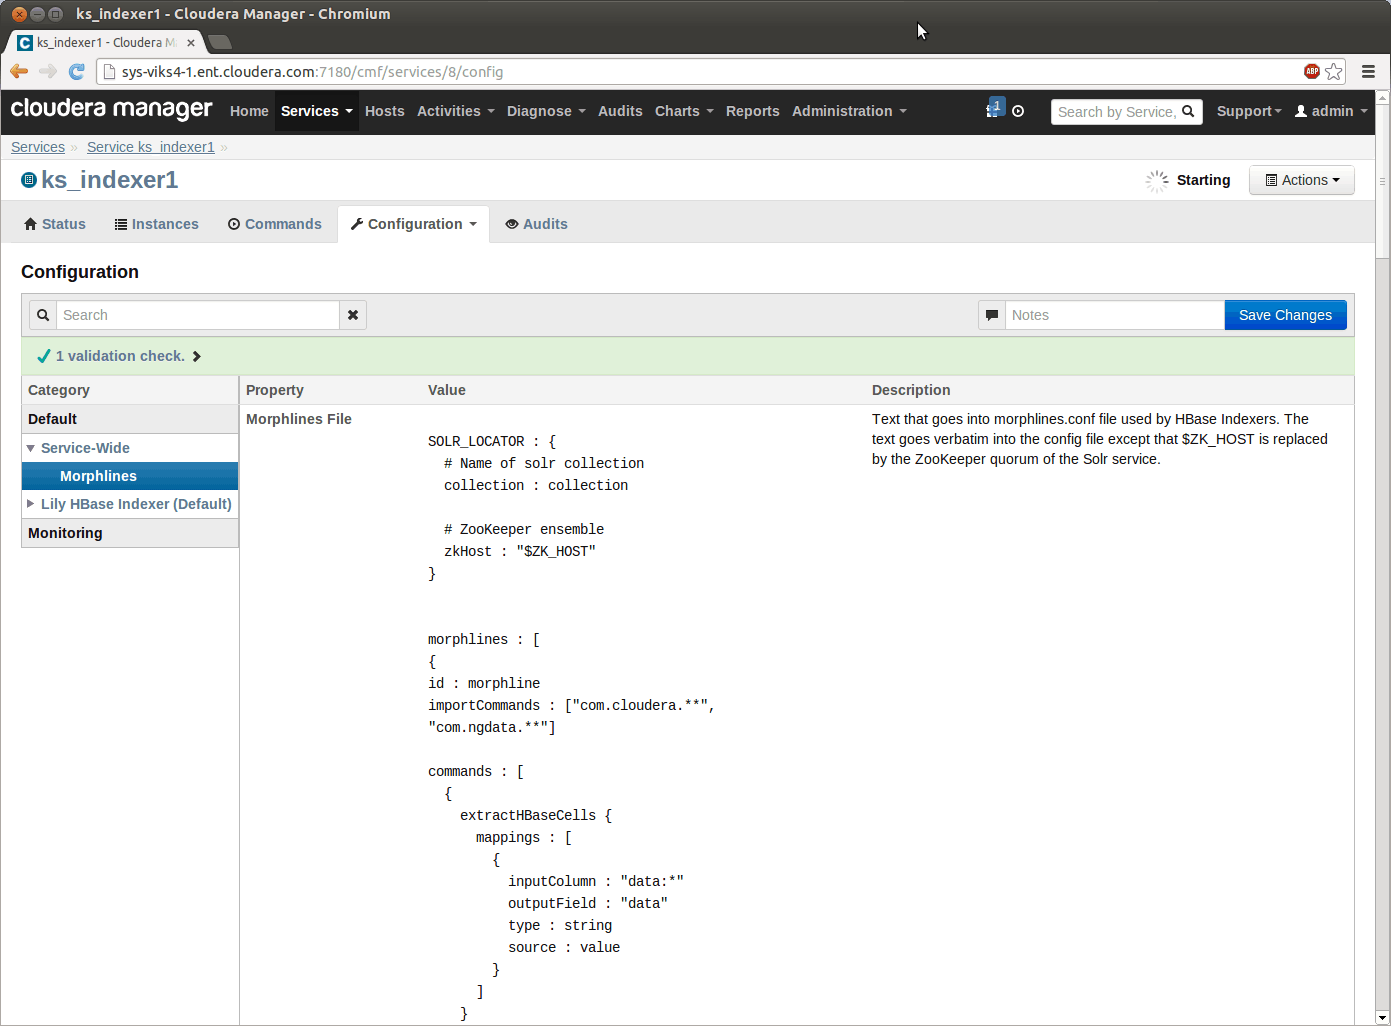
Also, note that Cloudera Manager includes a default Cloudera Morphlines file that can be used by the Lily HBase Indexer. To modify that file to use your own functions, you should navigate to the Keystore Indexer service and modify the Morphlines configuration as shown below:
Editing Cloudera Morphlines for Lily HBase Indexer
Once these changes are made, you can start using the Lily HBase Indexer to index any data coming into HBase by following the instructions in the Lily HBase Indexer User Guide. This blog post also provides a great example of how to index emails using HBase and Cloudera Search.
Conclusion
Now you know how easy it is to deploy, configure, and manage a Cloudera Search service to your CDH cluster using Cloudera Manager. Starting with Cloudera Enterprise 5 (in beta at the time of writing), Cloudera Search and Lily HBase indexer will install and start by default – making this process even easier.
Vikram Srivastava is a Software Engineer at Cloudera.


