


Many customers looking at modernizing their pipeline orchestration have turned to Apache Airflow, a flexible and scalable workflow manager for data engineers. With 100s of open source operators, Airflow makes it easy to deploy pipelines in the cloud and interact with a multitude of services on premise, in the cloud, and across cloud providers for a true hybrid architecture.
Apache Airflow providers are a set of packages allowing services to define operators in their Directed Acyclic Graphs (DAGs) to access external systems. A provider could be used to make HTTP requests, connect to a RDBMS, check file systems (such as S3 object storage), invoke cloud provider services, and much more. They were already part of Airflow 1.x but starting with Airflow 2.x they are separate python packages maintained by each service provider, allowing more flexibility in Airflow releases. Using provider operators that are tested by a community of users reduces the overhead of writing and maintaining custom code in bash or python, and simplifies the DAG configuration as well. Airflow users can avoid writing custom code to connect to a new system, but simply use the off-the-shelf providers.
Until now, customers managing their own Apache Airflow deployment who wanted to use Cloudera Data Platform (CDP) data services like Data Engineering (CDE) and Data Warehousing (CDW) had to build their own integrations. Users either needed to install and configure a CLI binary and install credentials locally in each Airflow worker or had to add custom code to retrieve the API tokens and make REST calls with Python with the correct configurations. But now it has become very simple and secure with our release of the Cloudera Airflow provider, which gives users the best of Airflow and CDP data services.
This blog post will describe how to install and configure the Cloudera Airflow provider in under 5 minutes and start creating pipelines that tap into auto-scaling Spark service in CDE and Hive service in CDW in the public cloud.
Step 0: Skip if you already have Airflow
We assume that you already have an Airflow instance up and running. However, for those who do not, or want a local development installation, here is a basic setup of Airflow 2.x to run a proof of concept:
# we use this version in our example but any version should work

pip install apache-airflow[http,hive]==2.1.2

airflow db init
airflow users create \

  --username admin \

  --firstname Cloud \

  --lastname Era \

  --password admin \

  --role Admin \

  --email airflow@cloudera.com
Step 1: Cloudera Provider Setup (1 minute)
Installing Cloudera Airflow provider is a matter of running pip command and restarting your Airflow service:
# install the Cloudera Airflow provider

pip install cloudera-airflow-provider

# Start/Restart Airflow components

airflow scheduler &

airflow webserver
Step 2: CDP Access Setup (1 minute)
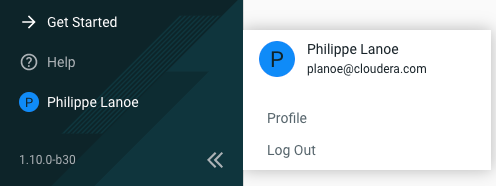
If you already have a CDP access key, you can skip this section. If not, as a first step, you will need to create one on the Cloudera Management Console. It is pretty simple to create. Click onto your “Profile” in the pane on the left-hand side of the CDP management console…
… It will bring you to your profile page, directly on the “Access Keys” tab, as follows:

Then you need to click on “Generate Access Key” (also on the pop-up menu) and it will generate the key pair. Do not forget to copy the Private Key or to download the credential files. As a side note, these same credentials can be used when running CDE CLI.
Step 3: Airflow Connection Setup (1 minute)
To be able to talk with CDP data services you need to set up connectivity for the operators to use. This follows a similar pattern as other providers by setting up a connection within the Admin page.
CDE provides a managed Spark service that can be accessed via a simple REST end-point in a CDE Virtual Cluster called the Jobs API (learn how to set up a Virtual Cluster here). Set up a connection to a CDE Jobs API in your Airflow as follows:
# Create connection from the CLI (can also be done from the UI):

#Airflow 2.x:

airflow connections add 'cde' \

--conn-type 'cloudera_data_engineering' \

--conn-host '<CDE_JOBS_API_ENDPOINT>' \

--conn-login "<ACCESS_KEY>" \

--conn-password "<PRIVATE_KEY>"

#Airflow 1.x:

airflow connections add 'cde' \

--conn-type 'http' \

--conn-host '<CDE_JOBS_API_ENDPOINT>' \

--conn-login "<ACCESS_KEY>" \

--conn-password "<PRIVATE_KEY>"
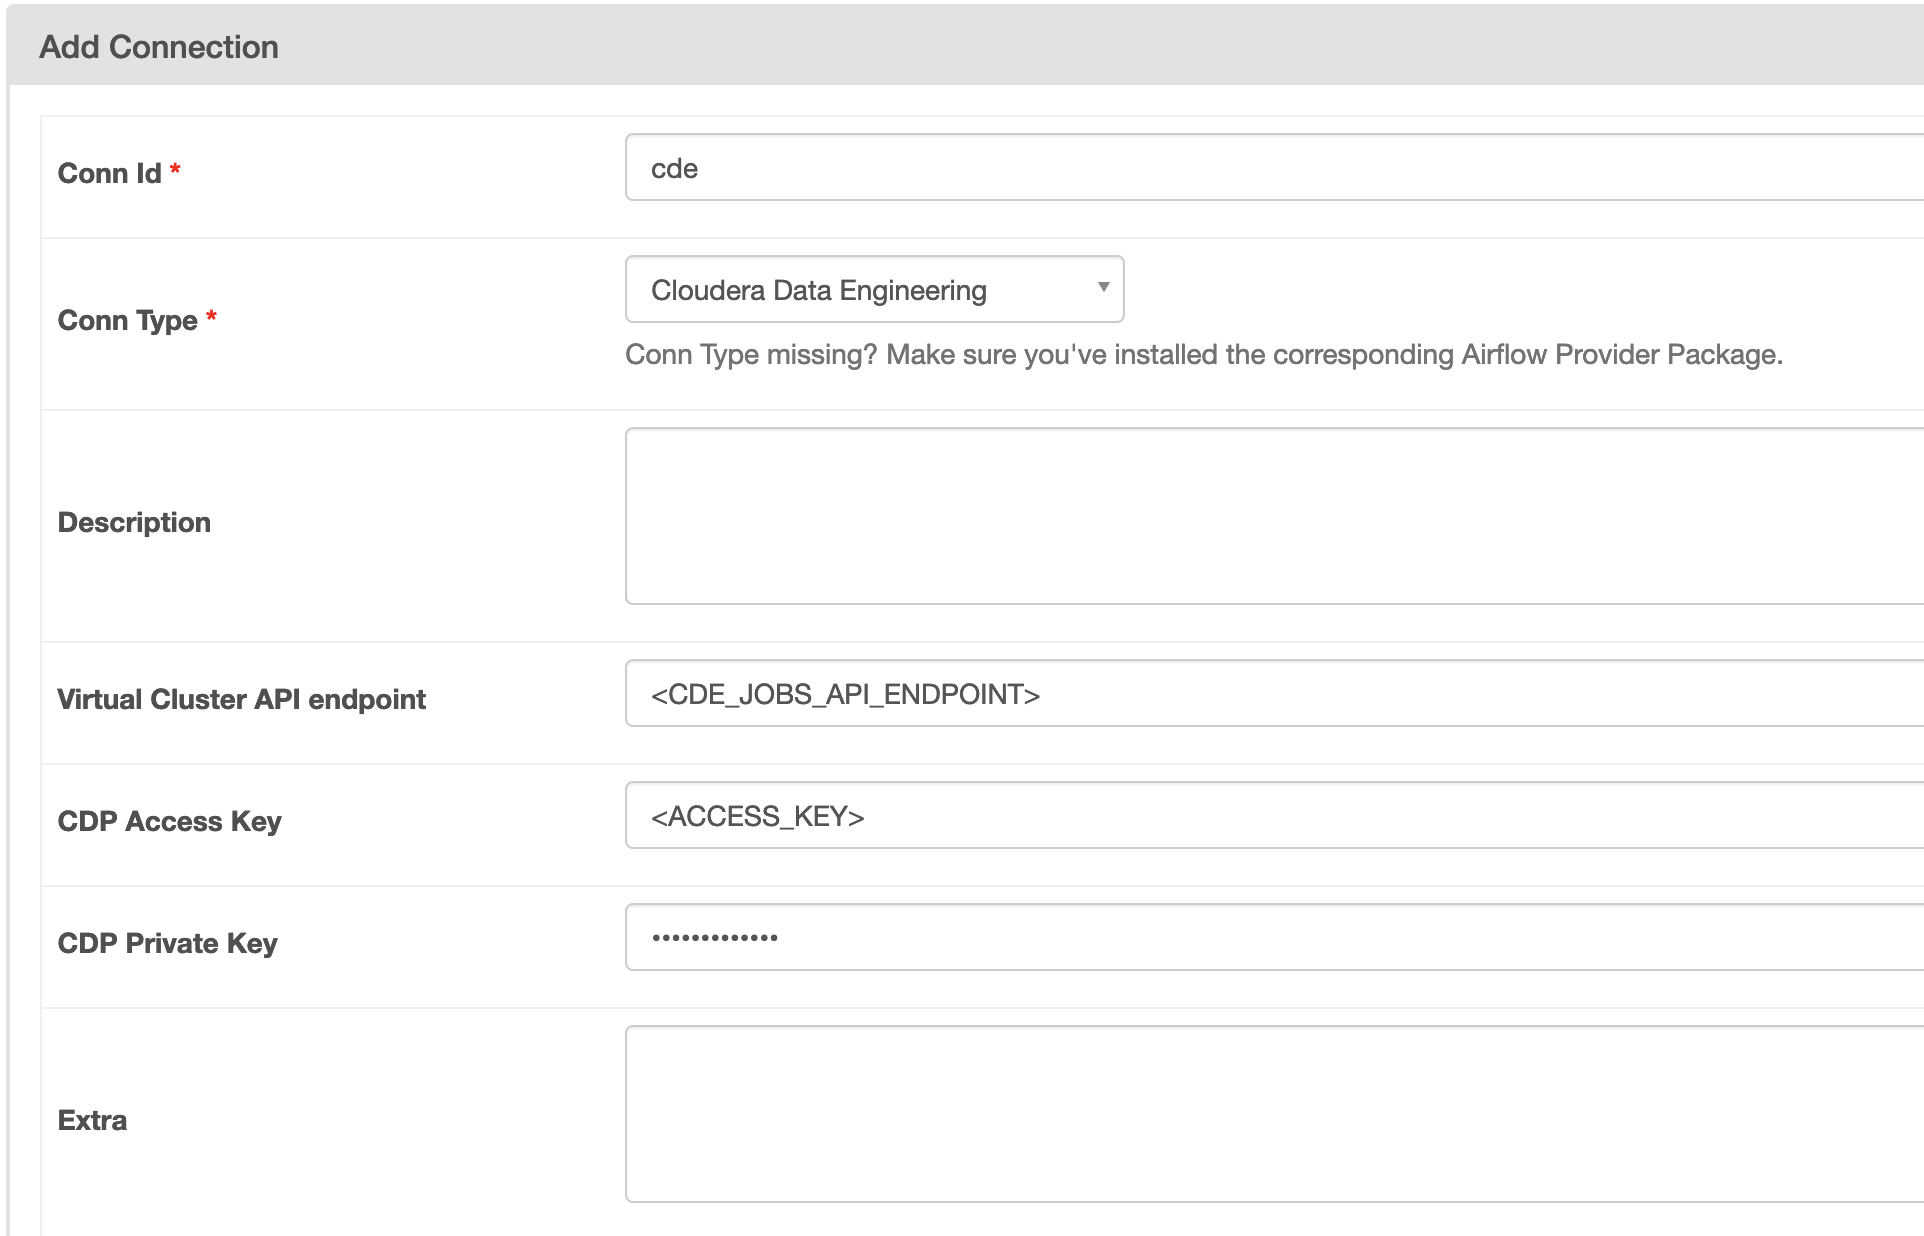
Please note that the connection name can be anything, ‘cde’ is just here as in example:
For CDW, the connection must be defined using workload credentials as follows (Please note that for CDW only user/name password is available through our Airflow Operator for now. We are adding access key support in an upcoming release):
airflow connections add 'cdw' \

--conn-type 'hive' \

--conn-host '<HOSTNAME(base hostname of the JDBC URL that can be copied from the CDW UI, without port and protocol)>' \

--conn-schema '<DATABE_SCHEMA (by default 'default')>' \

--conn-login "<WORKLOAD_USERNAME>" \

--conn-password "<WORKLOAD_PASSWORD>"
With only a few steps, your Airflow connection setup is done!
Step 4: Running your DAG (2 minutes)
Two operators are supported in the Cloudera provider. The “CDEJobRunOperator”, allows you to run Spark jobs on a CDE cluster. Additionally, the “CDWOperator” allows you to tap into Virtual Warehouse in CDW to run Hive jobs.
CDEJobRunOperator
The CDE operator assumes that a Spark job triggered has been already created within CDE on in your CDP public cloud environment, follow these steps to create a job.
Once you have prepared a job, you can start to invoke it from your Airflow DAG using a CDEJobRunOperator. First make sure to import the library
from cloudera.cdp.airflow.operators.cde_operator import CDEJobRunOperator
Then use the operator task as follows:

cde_task = CDEJobRunOperator(

   dag=dag,

   task_id="process_data",

   job_name='process_data_spark',

   connection_id='cde'

)
The connection_id ‘cde’ references the connection you defined in step 3. Copy your new DAG into Airflow’s dag folder as shown below :
# if you followed the Airflow setup in step 0, you will need to create the dag folder

mkdir airflow/dags

# Copy dag to dag folder

cp /tmp/cde_demo/cde/cde.py airflow/dags
Alternatively, Git can be used to manage and automate your DAGs as part of a CI/CD pipeline, see Airflow Dag Git integration guide.
We are all set! Now we simply need to run the DAG – to trigger via the Airflow CLI run the following:
airflow dags trigger <dag_id>
Or to trigger it through the UI:
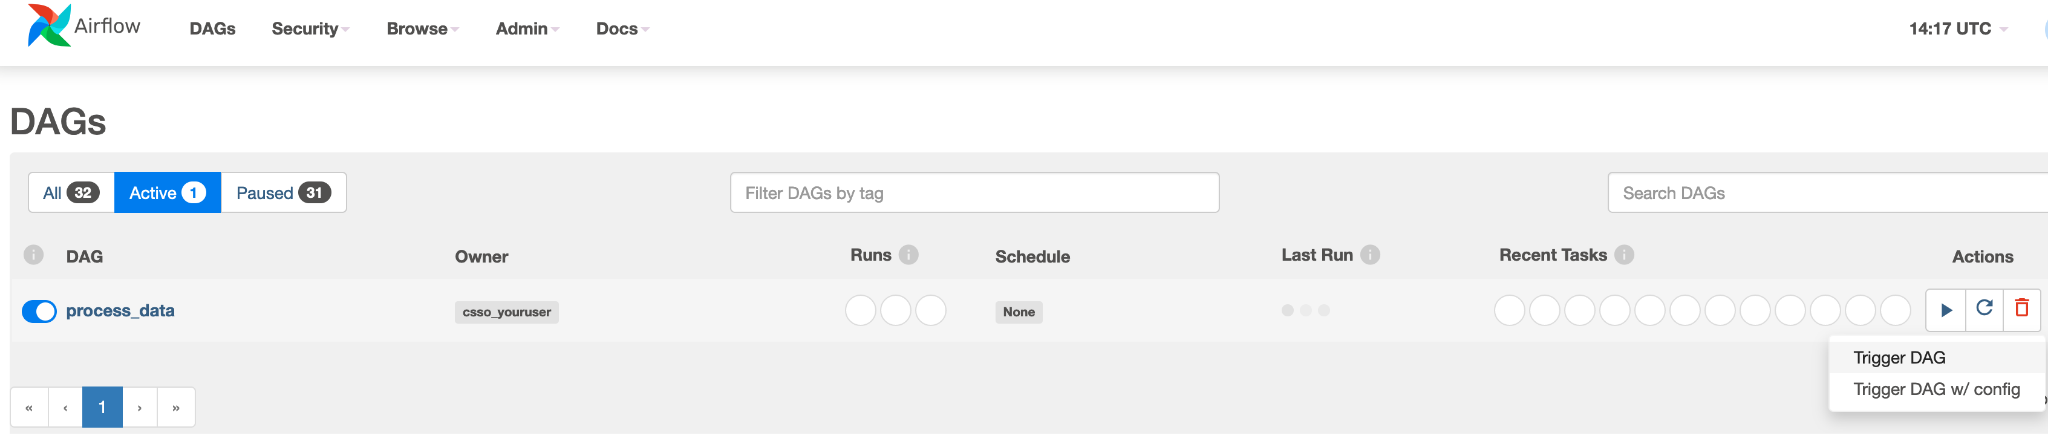
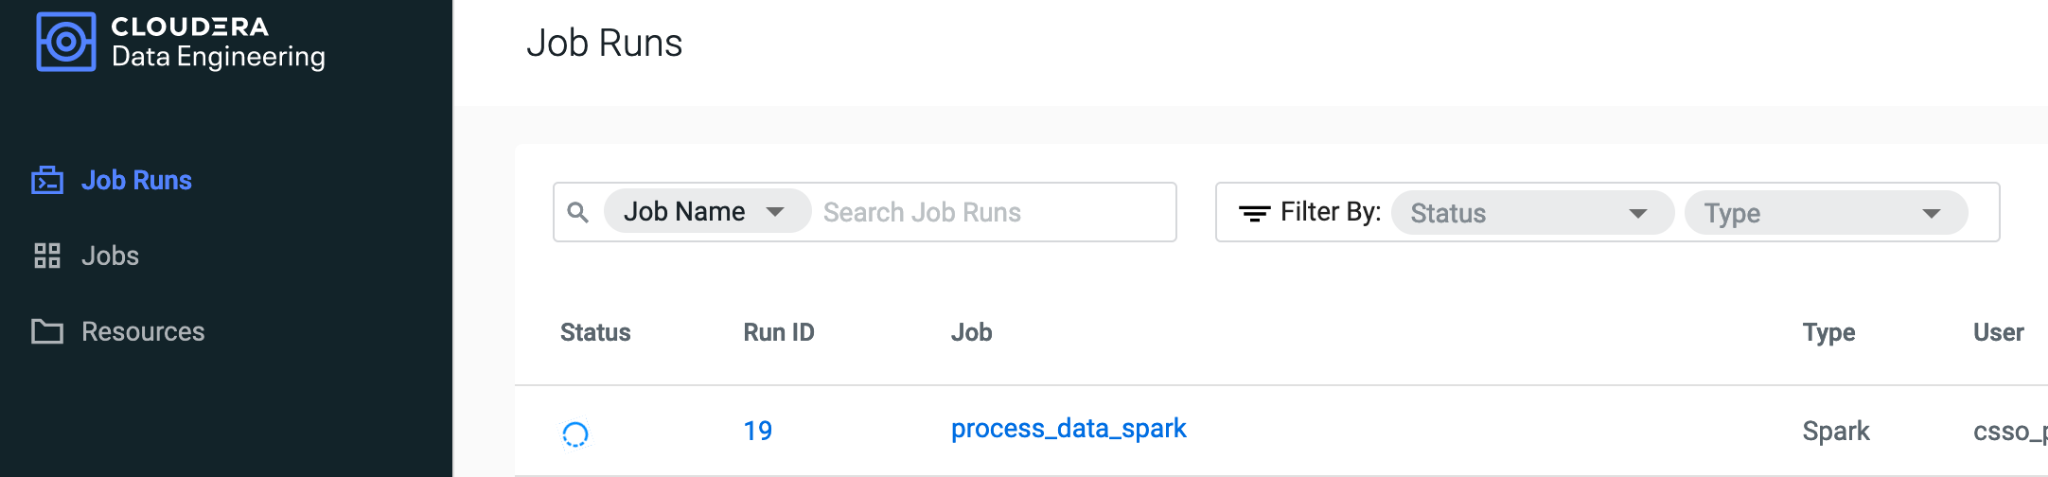
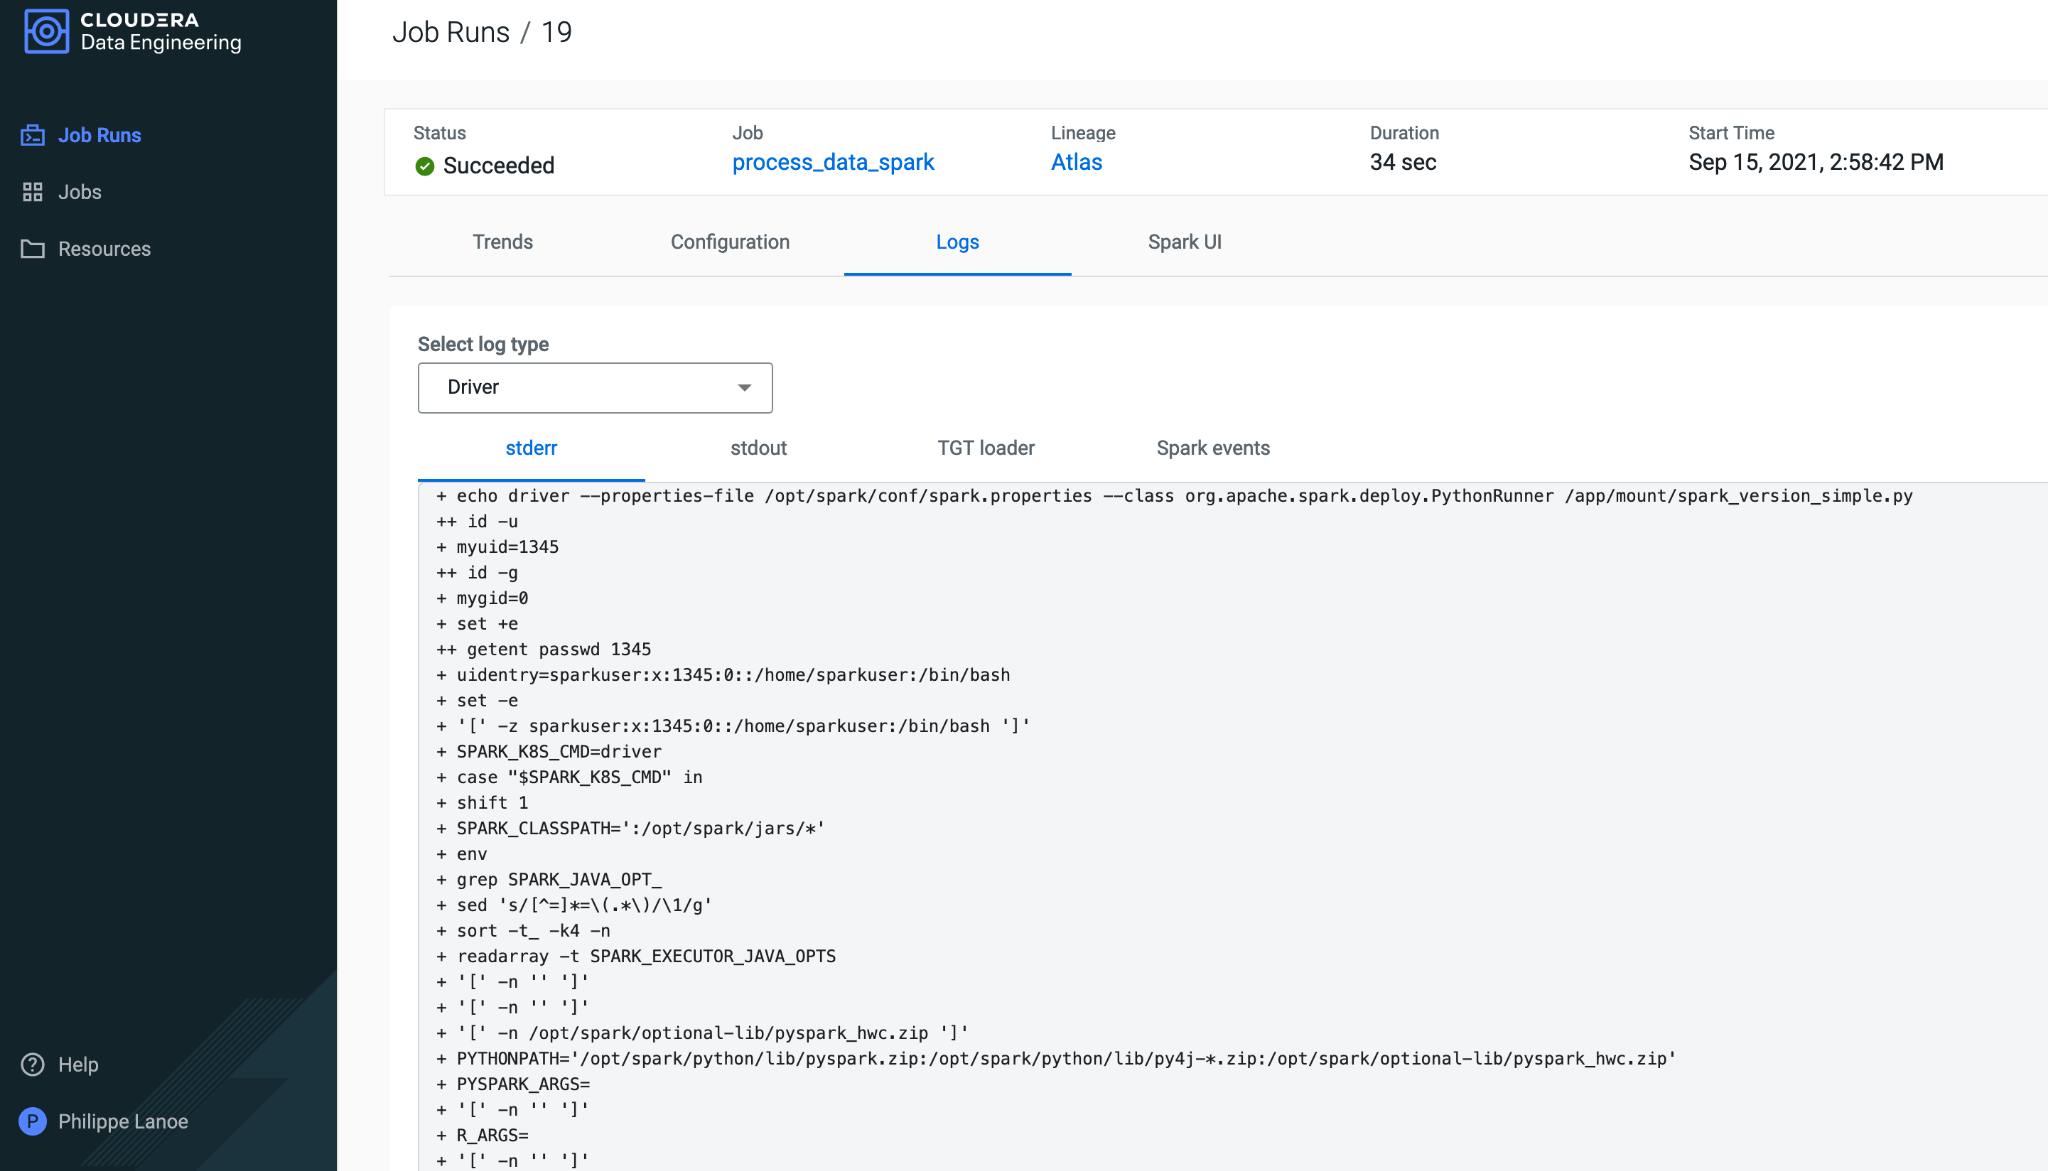
We can monitor the Spark job that was triggered through the CDE UI and if needed view logs and performance profiles.
What’s Next
As customers continue to adopt Airflow as their next generation orchestration, we will expand the Cloudera provider to leverage other Data Services within CDP such as running machine learning models within CML helping accelerate deployment of Edge-to-AI pipelines. Take a test drive of Airflow in Cloudera Data Engineering yourself today to learn about its benefits and how it could help you streamline complex data workflows.
Editor's Choice