

This blog post was published on Hortonworks.com before the merger with Cloudera. Some links, resources, or references may no longer be accurate.
This blog focuses on on-prem to on-prem HDFS replication for HDP clusters using Hortonworks Data Lifecycle Manager (DLM), an extensible service built on the Hortonworks DataPlane Platform.
Introduction to DLM
Data Lifecycle Manager (DLM) delivers on the promise of location-agnostic, secure replication by encapsulating and copying data seamlessly across physical private storage and public cloud environments. This empowers businesses to deliver the right data in the right environment to power the right use cases.
DLM v1.1 provides a complete solution to replicate data, metadata and security policies between on-premises and in cloud. It also supports data movement for data-at-rest and data-in-motion – whether the data is encrypted using a single key or multiple keys on both source and target clusters. DLM supports HDFS and Apache Hive dataset replication.
With DLM infrastructure administrators can manage their data, metadata and security management on-prem and in-cloud using a single-pane of glass that is built on open source technology. Business users can consume their workload outputs in the cloud with data-source-abstraction. DLM also enables business to reduce their capital expenditures and enjoy the benefits of flexibility and elasticity that cloud provides.
Prerequisites for HDFS replication using DLM application:
- Two symmetric HDP Clusters with DLM engine, core hadoop, Hive and Ranger services installed.
- Recommended configuration: Kerberos enabled + High Availability [ HDFS, YARN] + Apache Knox SSO enabled for Apache Ambari, Apache Ranger and DLM Engine.
HDFS Replication
The Apache Hadoop system is designed to store and manage large sets of data including HDFS and Hive data sets reliably. DLM 1.1 supports both HDFS and Hive dataset replication. Using HDFS replication we can replicate HDFS dataset between two on-premises clusters. In addition to data, related security policies associated with the dataset also get replicated.
Here is a step by step process to perform HDFS replication.
Step 0 : Adding Clusters for Replication
Using Hortonworks DataPlane Platform Service (DPS), add 2 ambari managed HDP clusters. Once the clusters are added, DPS provides information such as location of the clusters, number of nodes, uptime details of individual clusters. ( see Fig 1). Identify and designate one of the clusters as source-cluster and target-cluster for data replication.
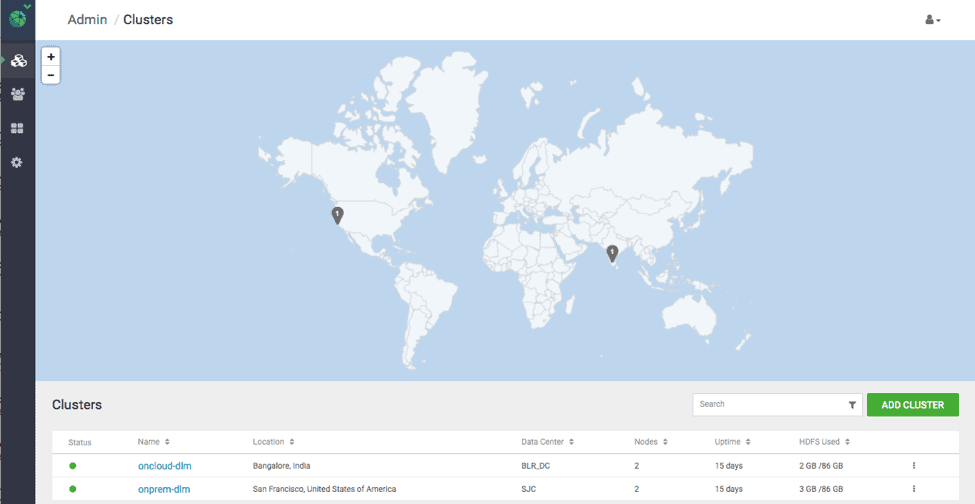
Fig 1 : DPS Cluster UI with the list of clusters added.
Step 1 : Pairing Clusters for Replication
HDP Clusters needs to be paired before creating DLM replication policies. Pairing ensures that cluster components are configured correctly for replication.
Below are the steps to perform pairing:
1.1 Login as DataPlane admin user in Hortonworks DataPlane Service (DPS) ( see Fig 2 )
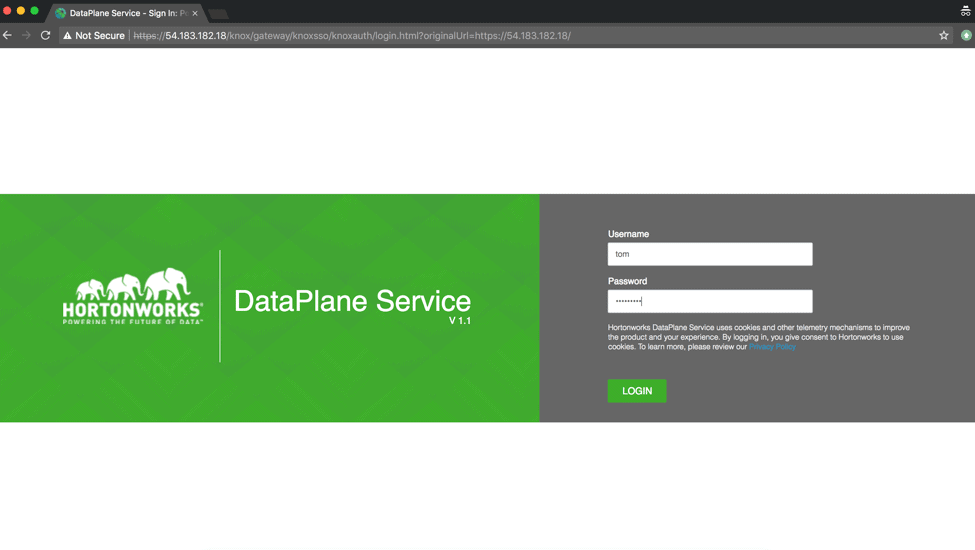
Fig 2 : DPS Login UI
1.2 Make sure that the logged-in user belongs to Dataplane Admin role ( see Fig 3)
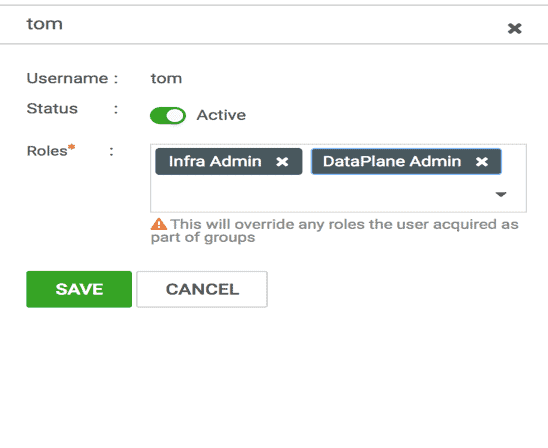
Fig 3 : DPS User Information along with Roles
1.3 From the top left corner, go to Data Lifecycle Manager app and click on the clusters page to see the list of clusters that can be used for replication. ( see Fig 4 )
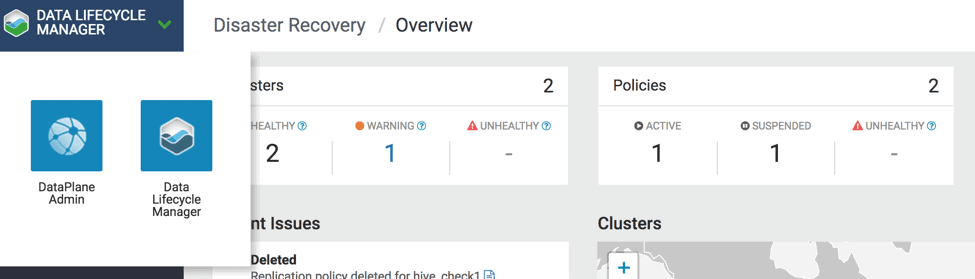
Fig 4 : Navigate DLM from DPS
1.4. User is then directed to DLM Cluster Dashboard page to view clusters, location, status, usage, and nodes. There is also an option to go to Ambari page from the cluster menu option. ( see Fig 5 )
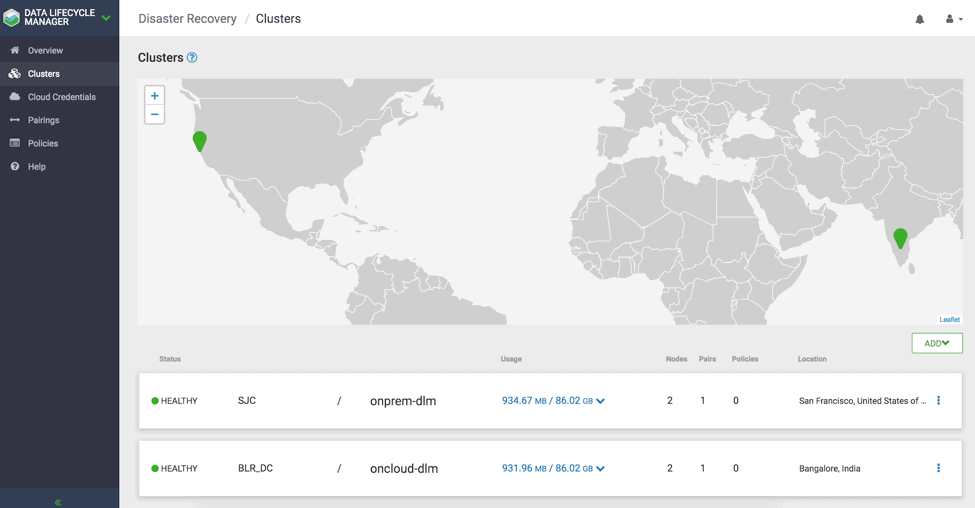
Fig 5 : DLM Cluster showing list of clusters for replication
1.5 In the DLM navigation pane, click on Pairings.
1.6 Click Add Pairing. ( See Fig 6) The Create Pairing page displays the clusters that are enabled for replication.
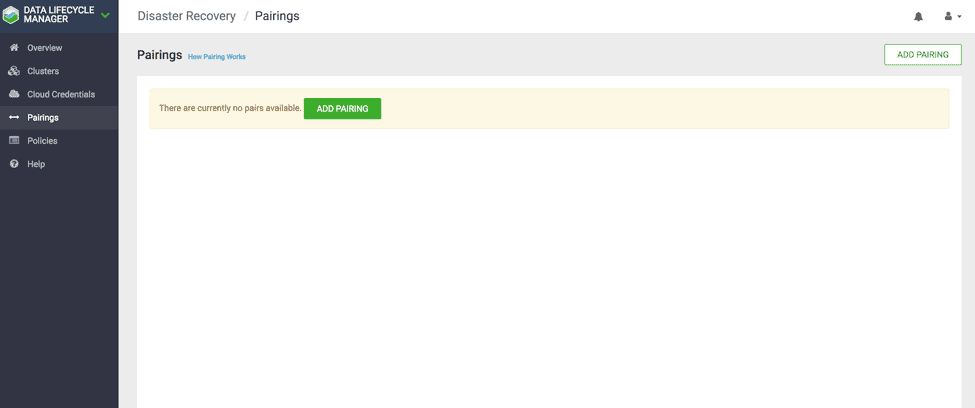
Fig 6 : DLM Pairing UI
1.7 Click on one of the clusters. All clusters eligible for pairing with the cluster will be displayed in the second column.
1.8 Click a cluster in the second column.
1.9 Click Start Pairing. ( see Fig 7 )
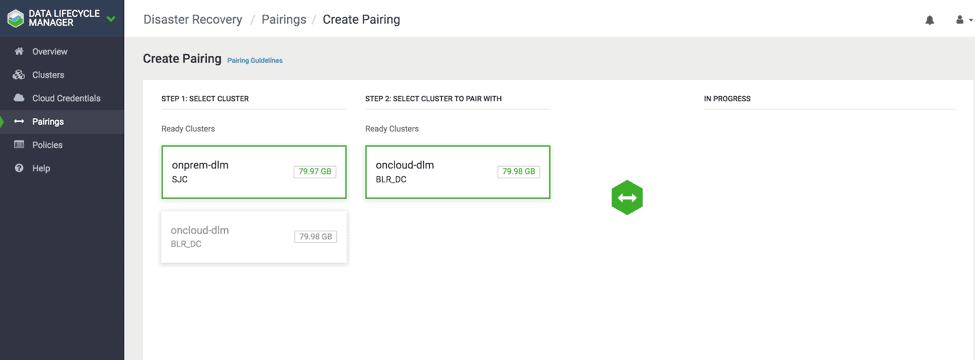
Fig 7 : DLM Pairing Steps
2.0 A progress bar displays the status of the pairing and a notification appears once the pairing is complete. ( See Fig 8)

Fig 8 : DLM Pairing Successful
Step 2 : Policy Creation
2.1 In the DLM navigation pane, click Policies. ( See Fig 9)
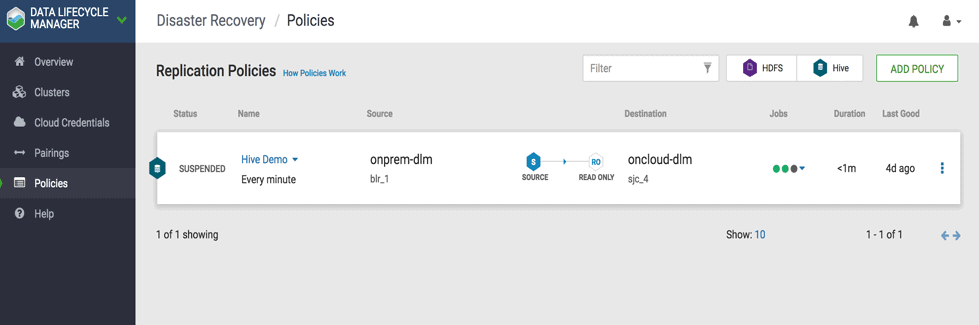
Fig 9 : DLM Policies UI
2.2 The Replication Policies page displays a list of existing policies. Click “Add Policy”. ( see Fig 10)
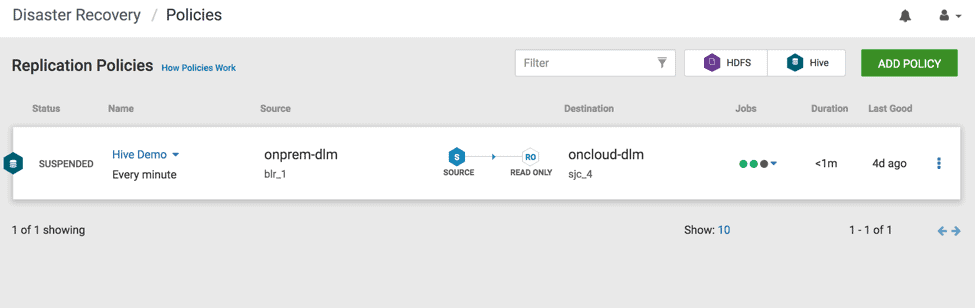
Fig 10 : “ADD POLICY” on the top right corner
2.3 Enter or select the following information:
- Policy Name ( Required ) –> Enter the policy name of your choice
- Service –> Select HDFS ( See Fig 11)
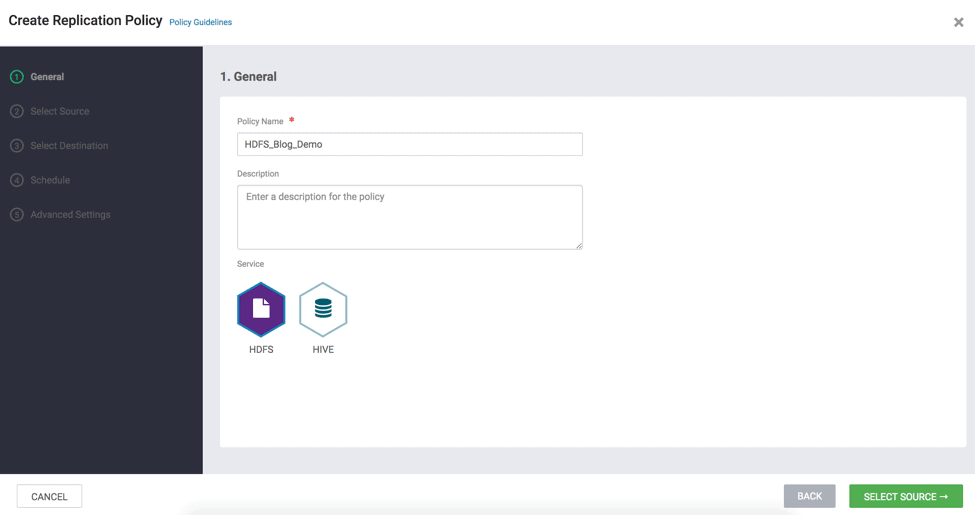
Fig 11 : Create Replication Wizard – Select Service
- On Select Source page –> Select Type as “Cluster” –> Select Source Cluster as one of the clusters that you added in the previous section (source cluster). ( See Fig 12)
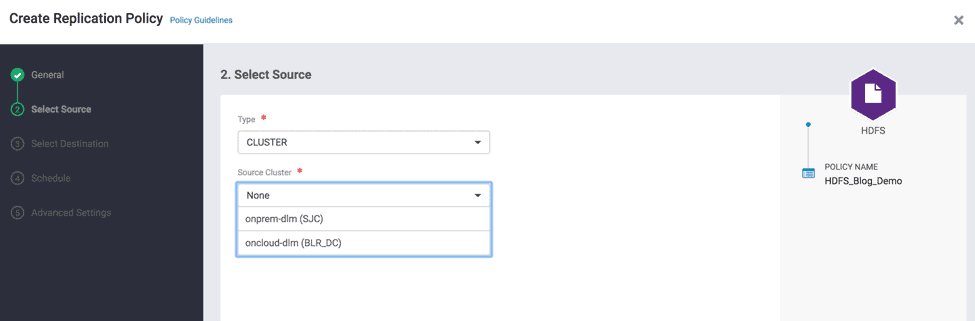
Fig 12 : Create Replication Wizard – Select Source Cluster
- Navigate using File browser and select the existing folder path on source cluster (e.g., /apps/weblogs_1/ – ( See Fig 13 & 14)
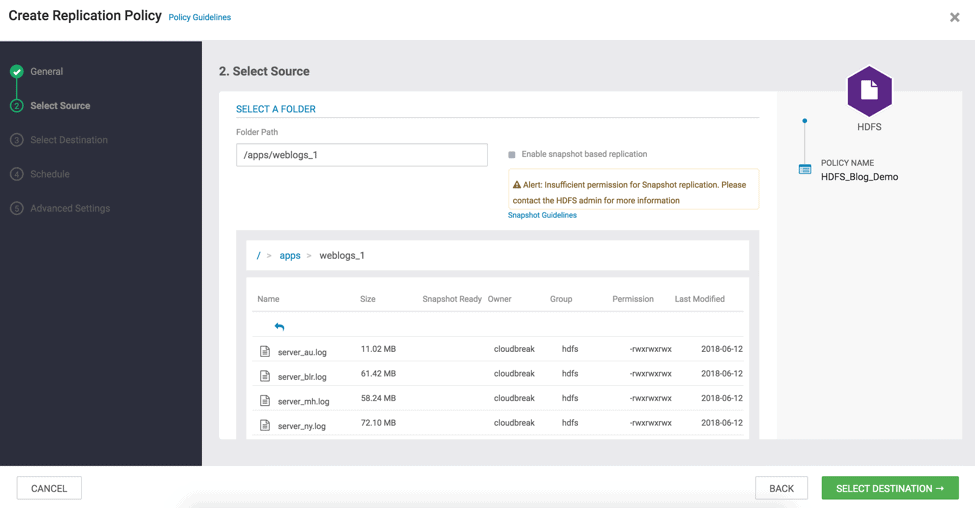
Fig 13 : Create Replication Wizard – Select Source Folder
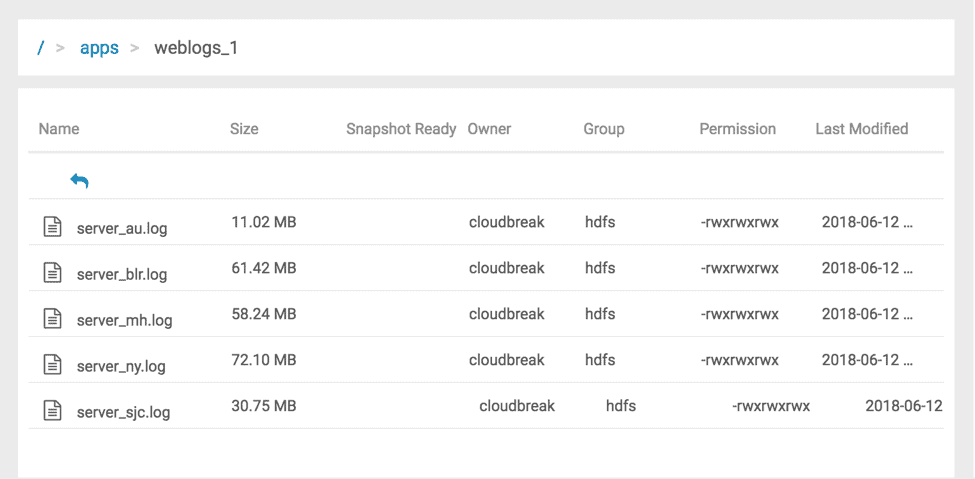
Fig 14 : Create Replication Wizard with File Browser
- On the Select Destination page –> Select Type as Cluster –> Select an existing cluster (e.g., BLR_DC) – ( see Fig 15 )
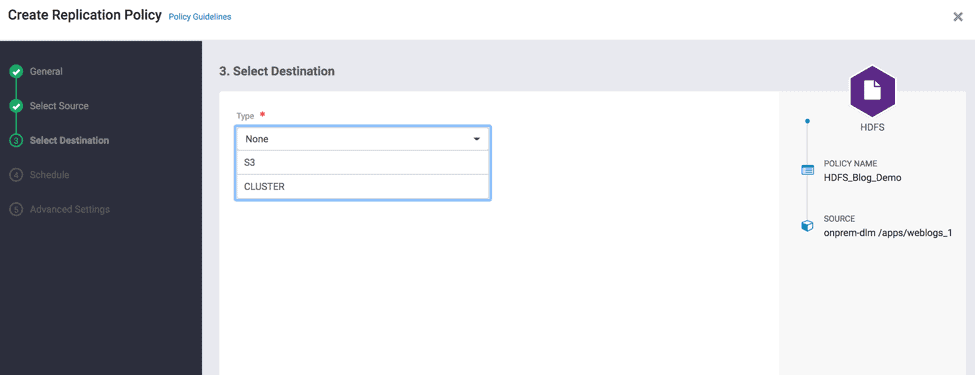
Fig 15 : Create Replication Wizard – Select Target Cluster
- Specify the Destination folder path where you want the data to be replicate to ( see Fig 16 )
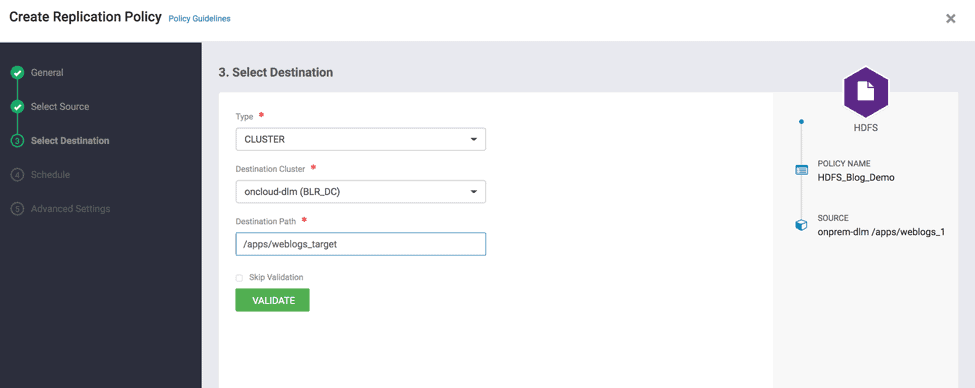
Fig 16 : Create Replication Wizard – Select Destination Path
- Validate the path and click on “Schedule”. “Validate” ensures that the user has required file permissions to copy to the Destination cluster. ( see Fig 17 )
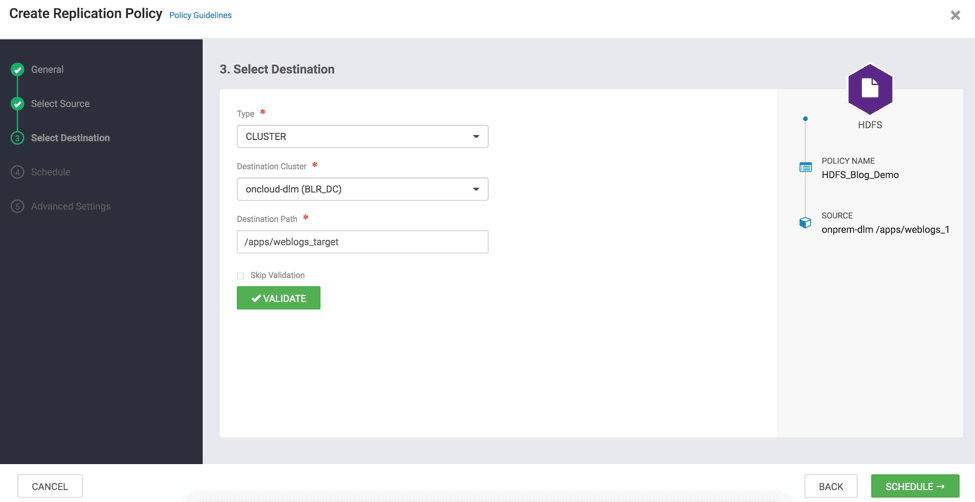
Fig 17 : Create Replication Wizard – Validate
2.4 In Run Job Section, Click on “From Now” and enter the frequency of replication ( e.g., Freq – 5 and select Minutes(s) – for demo purpose) and Click Advanced Settings ( see Fig 18 )
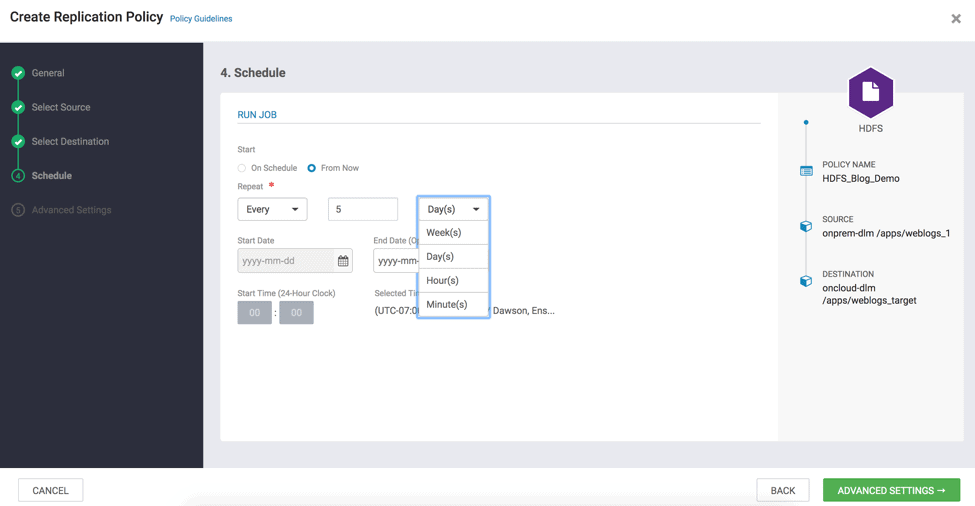
Fig 18 : Create Replication Wizard – Schedule
2.5 Queue and Maximum bandwidth are optional parameters. Set them if required for the replication. Click “Create Policy”. ( see Fig 19 )
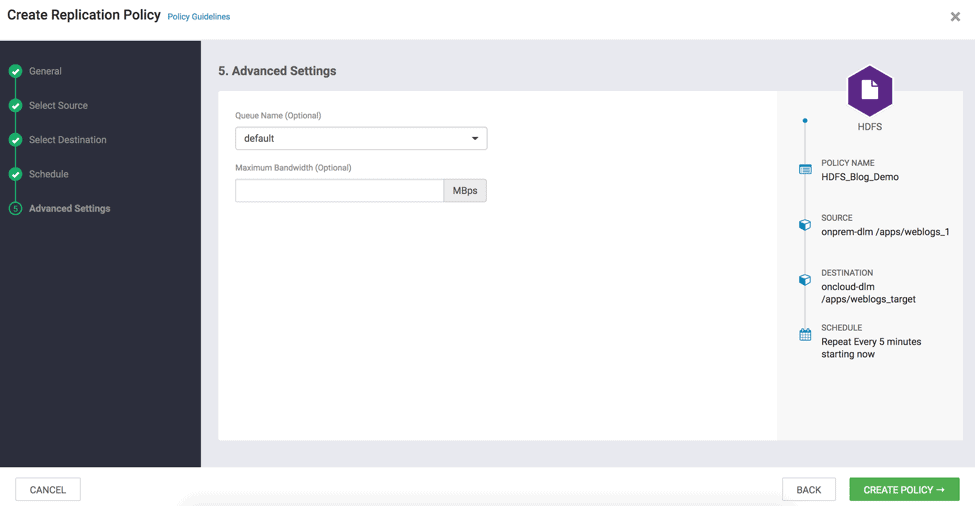
Fig 19 : Create Replication Wizard – Advanced Settings
2.6 Once the policy is created successfully , you can see the alert Policy Created successfully. ( see Fig 20)
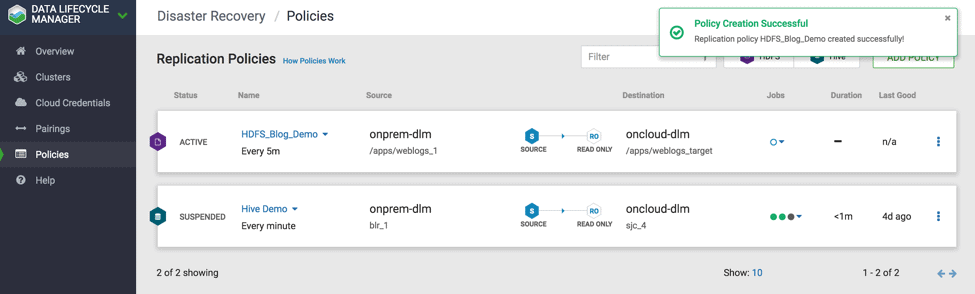
2.7 Now you can see the policy is successfully created and bootstrap is in progress. Bootstrap is defined as the first time the full copy of the dataset object from source to destination cluster. The subsequent policy instance will execute based on incremental replication which copies only the changed/updated data from source to destination dataset. ( see Fig 21)
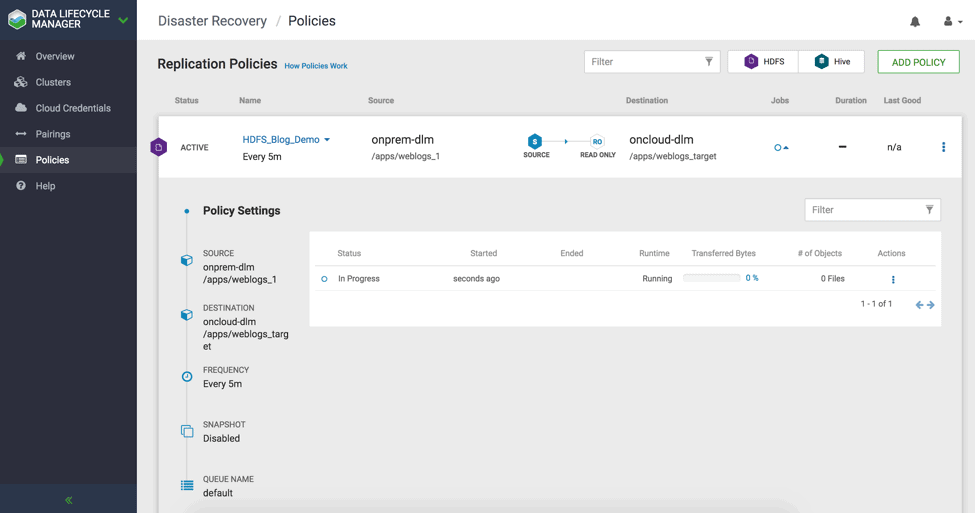
2.8 Once the bootstrap completes successfully, second DLM policy instance initiates incremental replication. ( see Fig 22)
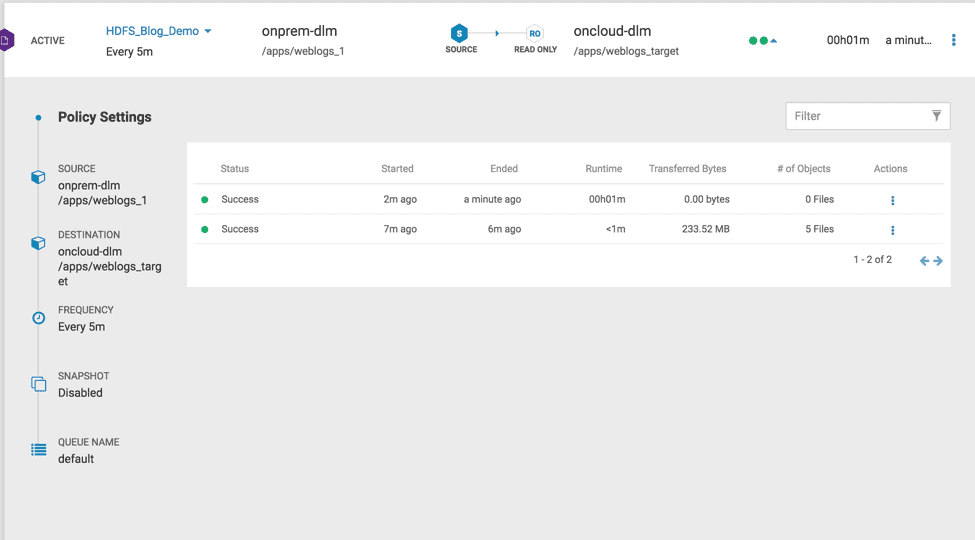
Fig 22 : DLM Replication policy with Incremental instance
2.9 Now, You can see the data replicated from source cluster to target hadoop cluster. ( see Fig 23)
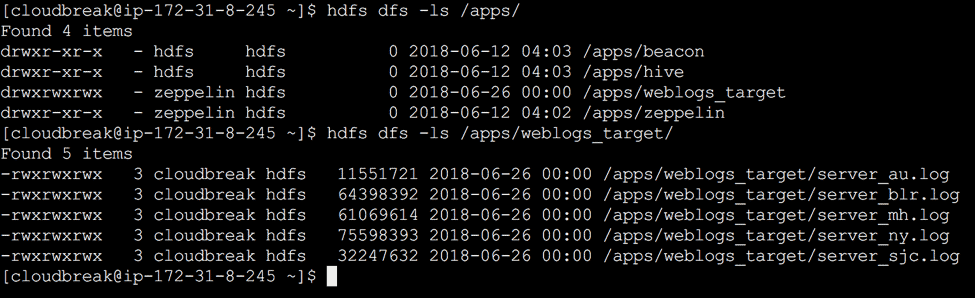
Fig 23 : Dataset replicated in target cluster
Conclusion:
HDFS replication from a source cluster to a selected destination cluster is possible by following simple steps as shown above. The user experience is seamless from one single pane of glass where the user was able to add clusters, pair clusters, add replication policies and execute replication policies successfully.
Interested in learning more? Visit our previous blog about Data Replication in Hadoop
Editor's Choice